If you own a Flashforge 3D printer, keeping its firmware current is one of the easiest ways to get more reliable prints, unlock new features, and squeeze extra speed out of your machine. Whether you’re running an Adventurer 5M, an AD5X, or a Guider 3 Ultra, this guide walks you through everything: official OTA updates, manual USB installs, community-built custom firmware like Klipper mods, and the troubleshooting steps you’ll need if something goes sideways. Let’s get into it.
Why Firmware Updates Matter in 2026
Firmware is the brain of your printer. It controls everything from motion planning to bed leveling, temperature regulation, and how the touchscreen behaves. Flashforge ships frequent updates because 3D printing hardware and software keep evolving, and a printer that isn’t updated regularly tends to fall behind on both performance and reliability.
On the performance side, newer firmware builds often refine motion control algorithms, improve flow calculations, and reduce artifacts like ringing or layer shifting. These aren’t always dramatic overhauls, but cumulatively they make a real difference in print quality, especially on high-speed CoreXY machines like the Adventurer 5M series.
New functions are another big driver. Flashforge has steadily added camera detection support, pause and resume commands, multi-color handling on machines like the AD5X, and refinements to the print preview interface. Many of these features didn’t exist at launch and only became available through firmware updates months or years later.
Stability is arguably the most important reason to stay current. Firmware updates regularly patch crashes during printing, fix configuration-saving errors, and resolve quirks in how files are read and written from USB or network storage. If you’ve ever had a print job mysteriously freeze or a setting silently reset, there’s a good chance a later firmware version addressed exactly that issue.
Finally, there’s the security angle. Since these printers connect to Wi-Fi, support OTA updates, and sometimes integrate with cloud or local network services, keeping firmware current matters for closing potential vulnerabilities, just like it does with a router or smart home device.
The bottom line: firmware updates aren’t optional maintenance you can skip indefinitely. They’re an ongoing part of owning a modern, connected 3D printer.
Supported Flashforge Printers
Not every Flashforge printer receives firmware updates in the same way, and not every model is still actively supported. Before you start, it helps to know where your printer stands.
| Printer | Update Method | Notes |
|---|---|---|
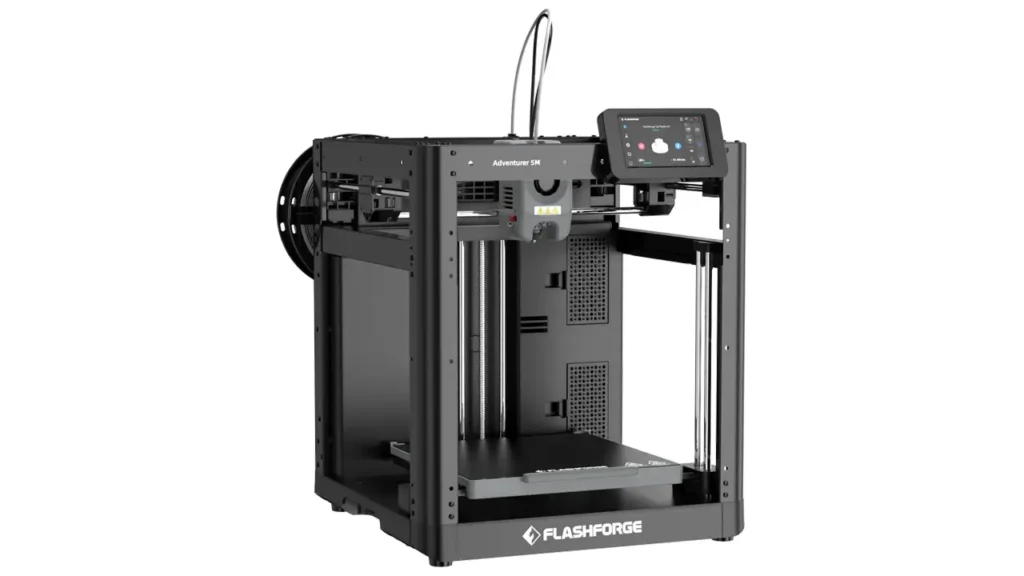
| Adventurer 5M / 5M Pro | OTA + USB | Most actively updated model, also supports community Klipper mods |
| AD5X | OTA + USB | Multi-color and IFS firmware updates released regularly |
| Guider 3 Ultra | OTA + USB | Enterprise-oriented machine with its own update channel |
| Guider / Finder Series | USB (legacy) | Older models, check Flashforge support pages for current availability |
If you’re unsure which firmware track your machine is on, check the device info screen on the printer itself, or the model-specific support section on Flashforge’s official site. Newer machines (Adventurer 5M series, AD5X, Guider 3 Ultra) get the most frequent attention, while older Finder and original Guider models receive updates far less often, if at all.
Preparing for a Firmware Upgrade
A little prep work goes a long way toward making your firmware upgrade painless. Before you touch anything, take these steps.
First, back up your settings. This includes calibration values like Z-offset, any custom print profiles in your slicer, and notes on your current leveling configuration. Firmware updates occasionally reset certain parameters, and having a record means you won’t be guessing afterward.
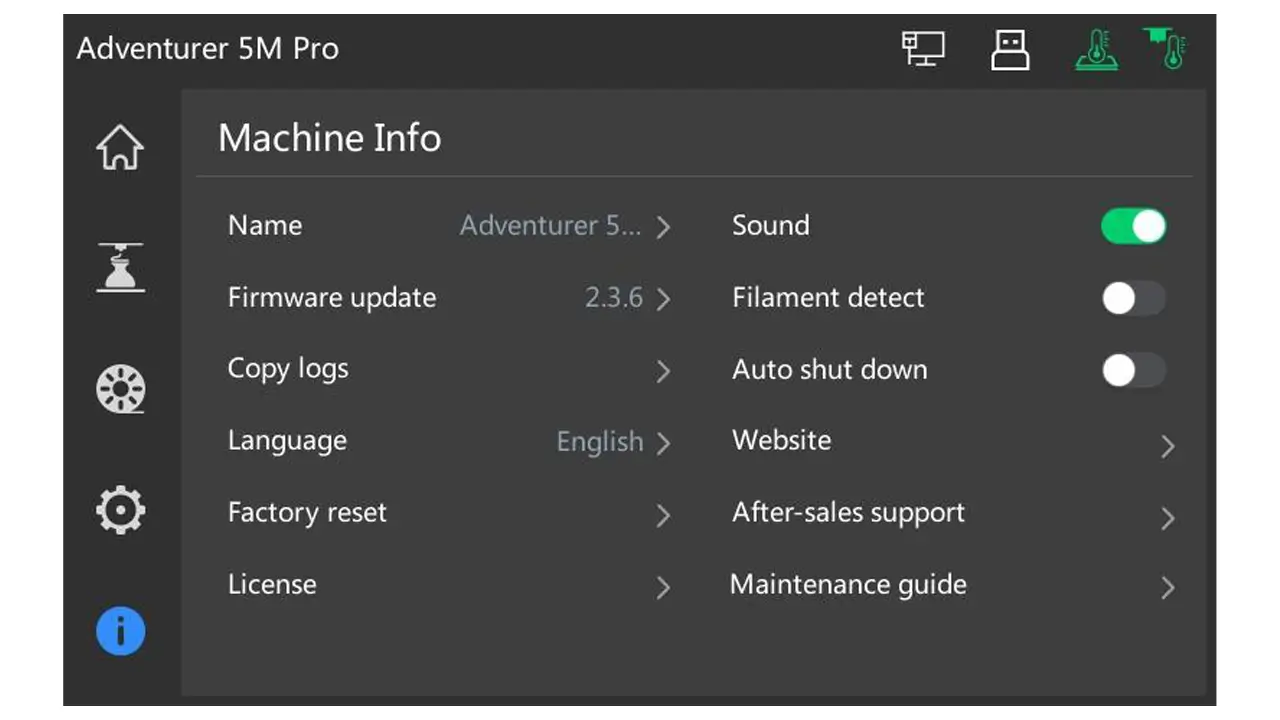
Second, check your current firmware version. This is usually found in the printer’s settings or device info menu. Knowing your starting point helps you understand what’s changing and lets you reference the correct release notes if you run into an issue later.
Third, confirm your network requirements if you plan to use OTA. Your printer needs a stable Wi-Fi or Ethernet connection during the entire update process. A dropped connection mid-update can, in rare cases, cause an incomplete flash, so it’s worth double-checking signal strength or using a wired connection if your printer supports it.
Fourth, if you’re going the USB route instead, prepare your drive in advance. That means formatting it as FAT32, downloading the correct firmware file for your exact printer model, and placing that file directly in the root directory of the drive rather than inside a folder.
One more thing worth doing: make sure your print bed is clear and the printer is idle. Never start a firmware update mid-print, and avoid powering the printer off manually until the process explicitly tells you it’s safe to restart.
Flashforge Firmware Update
Latest firmware updates and installation guides for Flashforge 3D printers. Improve performance, unlock new features, and ensure compatibility with the newest printing technologies.
- • Latest Firmware Versions
- • Step-by-Step Installation
- • Performance Improvements
- • Bug Fixes & Stability
Step-by-Step OTA Firmware Update
Over-the-air updates are the simplest way to keep your Flashforge printer current, and they’re built directly into the printer interface.
- Connect your printer to Wi-Fi or Ethernet. The first time it connects, it automatically checks Flashforge’s servers for available firmware.
- Watch for the update prompt. If new firmware is available, a notification pops up on the touchscreen with a summary of what’s changed. You can scroll through the full update log before deciding.
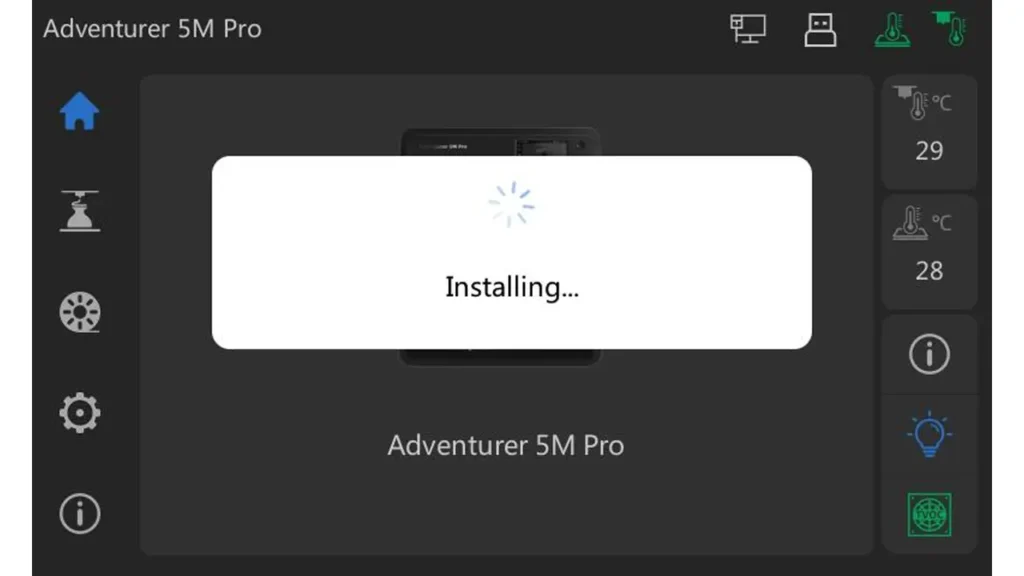
- Tap to confirm the install. Selecting yes begins downloading and installing the new firmware automatically.
- If no prompt appears but you suspect an update is available, head to the device info screen and manually trigger a check, usually through a “Firmware Update” or “Update” button.
- Restart the printer once the installation finishes. Most models will prompt you to do this manually rather than rebooting automatically.
The whole process typically takes a few minutes, and your settings are generally preserved. Still, it’s worth giving your printer a quick once-over after the update, checking the bed level and running a small test print, just to confirm everything behaves as expected.
OTA is the recommended path for most users because it pulls directly from Flashforge’s official firmware servers, reducing the risk of installing a corrupted or mismatched file.
Manual Firmware Installation via USB
USB installation is your backup option if OTA isn’t working, if you don’t have reliable network access near your printer, or if you simply prefer a manual process.
Start by downloading the firmware file for your specific printer model from Flashforge’s official downloads page. Firmware files are model-specific, so installing the wrong one can cause serious problems. Double-check that the file matches your printer’s exact name, including whether it’s the Pro variant.
Next, prepare your USB drive. Format it as FAT32 (most drives ship this way, but it’s worth confirming), then copy the firmware file onto the root of the drive. Don’t place it inside a subfolder, as most printers won’t detect it there.
With the printer powered off, insert the USB drive, then power the printer back on. The screen should display a message indicating it has detected the firmware file and is beginning installation. Let this process run uninterrupted.
Once the update completes, you’ll typically be prompted to reboot. On most models, holding the power button for around ten seconds triggers a restart, after which the printer finalizes the installation.
A simple comparison can help you decide which method fits your situation better:
| Method | Best For | Requirements |
|---|---|---|
| OTA Update | Routine updates | Stable Wi-Fi or Ethernet |
| USB Update | No network, failed OTA, fresh reinstall | FAT32 drive, correct firmware file |
Best Custom Firmware Options
Beyond Flashforge’s official releases, a community of enthusiasts has built alternative firmware for certain models, most notably the Adventurer 5M and 5M Pro. These projects replace or extend the stock firmware with Klipper, a popular open-source firmware used widely across the 3D printing hobby for its flexibility and tuning capabilities.
The appeal is straightforward. Custom firmware typically unlocks deeper control over motion parameters, advanced calibration tools, real-time monitoring through a web interface, and macro support that simply isn’t available on stock firmware. For users who like fine-tuning every aspect of their printer, this opens up a different level of customization.
That said, there are real risks involved. Installing custom firmware means flashing a modified system onto your printer’s internal storage, and if something goes wrong mid-process, you risk what the community calls “bricking” the device, leaving it unresponsive. Recovery is usually possible but can require additional hardware or technical know-how. It’s not something to attempt without reading the documentation carefully first.
Warranty is the other major consideration. Installing unofficial firmware is explicitly outside of normal supported use, and doing so can affect your ability to claim warranty service, particularly if a hardware issue arises after the mod is installed. Most custom firmware projects are upfront about this risk and recommend you back up your settings and proceed at your own risk.
If you’re new to 3D printing or you rely on your printer for consistent day-to-day work, sticking with official Flashforge firmware is the safer, lower-maintenance choice. If you’re comfortable troubleshooting and want maximum control, custom firmware is worth exploring, but go in with realistic expectations about the learning curve.
Flashforge Klipper Mod Installation
The most prominent community project bringing Klipper to the Adventurer 5M family is known as Forge-X, an open-source, unofficial mod built specifically for the AD5M and AD5M Pro. It’s the spiritual successor to earlier Klipper mods for these printers, rebuilt to address stability problems like excessive memory use and timing errors that plagued some of the original community firmware.
Forge-X bundles together several well-known open-source tools. Moonraker acts as the API layer that lets external interfaces talk to Klipper. Fluidd and Mainsail are two popular web-based control panels, giving you a browser-accessible dashboard for monitoring prints, adjusting settings, and running macros, something the stock Flashforge interface doesn’t offer. Once installed, you can typically reach these interfaces directly through your printer’s IP address on your local network.
Beyond the core Klipper stack, the mod adds features like adaptive bed meshing, improved shaper calibration with automatic plotting, root-level system access, OTA updates for the mod itself, and fixes for known AD5M error codes related to move queue overflows and communication timeouts. It also supports a dual-boot setup, meaning you can switch back to stock Flashforge firmware without fully uninstalling the mod, which adds a layer of safety for cautious users.
Installation involves flashing a firmware image to the printer, then updating your slicer’s start and end G-code along with its host type settings so it communicates correctly with the new Klipper backend. After installation, a full recalibration is mandatory, including bed mesh, input shaper, and Z-offset, since these values can shift during the mod’s setup process.
Given the technical depth involved, this is best suited to users who are comfortable following detailed documentation step by step and who don’t mind some trial and error. The community support channels around these mods are active, but you’re ultimately responsible for your printer’s safety once you’ve stepped outside official firmware.
Polimerukr.com
Ukraine
3D Printing Materials & Supplies
Your trusted source for high-quality 3D printing materials in Ukraine. Wide selection of filaments, resins, and accessories for all printer types with fast local shipping.
How to Increase Print Speed by 20–30%
Speed gains on a Flashforge printer come from a combination of firmware capability and proper tuning, not just clicking a single setting. Whether you’re on stock firmware or a Klipper mod, the techniques below are where most of the gains come from.
Input shaping is one of the biggest contributors. It measures your printer’s resonance frequencies and compensates for vibration during fast moves, which lets you push acceleration and speed higher without introducing visible ringing or ghosting on your prints. Both stock high-end Flashforge firmware and Klipper-based mods support some form of this.
Acceleration tuning works hand in hand with input shaping. Once resonance is compensated for, you can often raise your maximum acceleration values meaningfully above default settings, cutting time spent ramping up and down between moves, especially on shorter, more detailed segments of a print.
Pressure advance, a Klipper-specific feature, controls how the extruder anticipates pressure changes in the nozzle during speed changes. Tuned correctly, it reduces blobbing on corners and stringing during fast travel moves, which means you can run higher speeds without sacrificing surface quality, particularly on detailed models with lots of direction changes.
For Flashforge owners on stock firmware, the official Flash Studio Desktop slicer (the software formerly known as Orca-Flashforge) includes printer-specific speed and quality profiles tuned for each model. These profiles are a good starting point, but manually adjusting wall speed, infill speed, and outer wall acceleration within reasonable limits for your specific filament can often unlock noticeably faster print times without major quality loss.
A simple way to think about the relationship between these settings:
| Technique | What It Improves |
|---|---|
| Input Shaping | Reduces ringing at high speed |
| Acceleration Tuning | Shortens move ramp-up time |
| Pressure Advance | Cleaner corners at speed |
| Slicer Profile Tuning | Optimized speed per filament type |
Realistic gains in the 20 to 30 percent range are achievable, but they depend heavily on your filament, model geometry, and how much margin your current settings leave on the table. Push too aggressively and you’ll start trading speed for quality, so treat tuning as an iterative process rather than a one-time setting change.
Fixing Common Firmware Problems
Even with careful preparation, firmware updates and printer operation occasionally hit snags. Here are the most common issues and what generally resolves them.
Failed updates usually stem from an interrupted connection during OTA, or a corrupted file during USB installation. If an OTA update fails partway through, try again on a stable connection, ideally wired if your printer supports Ethernet. For USB failures, re-download the firmware file fresh rather than reusing the same copy, and reformat your USB drive to rule out file system corruption.
Wi-Fi issues are a recurring theme across firmware versions, and Flashforge has addressed multiple connectivity bugs in past updates, including problems with printers dropping off the network or failing to reconnect after a router restart. If you’re experiencing persistent Wi-Fi trouble, check that you’re on the latest firmware first, since many of these issues get specifically targeted in update logs.
Homing errors, where the printer fails to correctly find its zero position, can stem from mechanical issues like a loose belt or dirty rails, but they’re also sometimes triggered by a firmware regression. If homing problems start right after an update, check the release notes for known issues, and don’t hesitate to report the behavior through official support channels.
Leveling failures are another area that’s seen repeated firmware attention, particularly around auto-leveling routines and nozzle wiping before calibration. If your bed mesh seems inconsistent or the printer reports leveling errors, confirm your nozzle and bed surface are clean, then check whether a firmware update has specifically addressed leveling stability for your model.
Offline printer bugs, where the device appears disconnected from your slicer or app despite being powered on, are usually network-related but occasionally tied to firmware service crashes. A full restart often resolves it temporarily, but if it’s a recurring problem, it’s worth checking community forums and official changelogs to see if it’s a known, tracked issue.
| Problem | First Step to Try |
|---|---|
| Failed OTA update | Retry on stable/wired connection |
| Failed USB update | Re-download file, reformat drive |
| Wi-Fi drops | Update firmware, check router settings |
| Homing errors | Check mechanics, review release notes |
| Leveling failures | Clean nozzle/bed, update firmware |
Latest Flashforge Firmware Features in 2026
Flashforge has kept up a steady cadence of firmware releases for its current lineup, and recent updates reflect a pattern of incremental but meaningful improvements rather than sweeping overhauls.
On the Adventurer 5M series, recent release notes have included automatic detection of external cameras directly through the interface, expanded support for pause commands and additional fan control codes, the ability to stop printing during the preparation phase rather than waiting for a full job to begin, and refinements to how print completion status is tracked during slicing. Quality-of-life additions like nozzle wiping before auto-leveling and the option to skip the default leveling check in the print preview screen have also rolled out, giving more experienced users finer control over their workflow.
Connectivity has been a consistent area of investment too. Updates have addressed how the printer reads and writes files, improved translation accuracy across the interface for international users, and fixed configuration-saving errors that previously caused settings to silently fail to persist.
On the software side, Flashforge rebranded its desktop and mobile companion apps. What was previously known as Orca-Flashforge is now called Flash Studio Desktop, and the mobile companion formerly known as Flash Maker is now Flash Studio Mobile. Functionally, these tools remain central to slicing, managing multiple printers remotely, and monitoring print progress when a camera kit is installed, but the renaming reflects Flashforge’s push toward a more unified software ecosystem across its product line.
For AD5X and Guider 3 Ultra owners, firmware updates have similarly focused on reliability: better handling of the automatic filament loading and refill system on the AD5X, and continued stability improvements for the Guider 3 Ultra’s enterprise-oriented features like multi-device monitoring and remote management.
Taken together, the picture for 2026 is one of steady refinement. Flashforge isn’t chasing flashy headline features so much as systematically working through bug fixes, leveling accuracy, network reliability, and small but useful interface improvements, exactly the kind of updates that reward users who keep their firmware current rather than letting it sit untouched for months at a time.
Whether you stick with official OTA updates or branch out into Klipper-based custom firmware, the underlying advice stays the same: back up your settings, read the release notes, and recalibrate after any significant update. Your printer will thank you with smoother prints and fewer surprises.
🇺🇸 Michael Thompson — ⭐⭐⭐⭐⭐
I found the Flashforge Firmware Update Guide 2026 on https://bestchina3dprinters.com/ extremely helpful. The step-by-step instructions were easy to follow, and the section about custom firmware and speed optimization was exactly what I needed. After applying some of the recommended settings, my printer performs noticeably better. Excellent resource for Flashforge owners.
🇪🇸 Carlos Martínez — ⭐⭐⭐⭐⭐
Excelente artículo en https://bestchina3dprinters.com/. La guía de actualización de firmware para Flashforge está muy bien explicada y contiene información práctica que realmente ayuda. Me gustó especialmente la parte sobre cómo aumentar la velocidad de impresión y solucionar errores comunes. Muy recomendable para cualquier usuario de impresoras 3D.
🇸🇦 أحمد الخالدي — ⭐⭐⭐⭐⭐
مقال رائع على موقع https://bestchina3dprinters.com/ . الشرح واضح ومفصل، وخطوات تحديث برنامج Flashforge سهلة المتابعة. استفدت كثيرًا من قسم تحسين سرعة الطباعة وإصلاح المشكلات الشائعة. من أفضل المواقع التي تقدم محتوى احترافيًا عن الطباعة ثلاثية الأبعاد.
🇨🇳 王伟 (Wang Wei) — ⭐⭐⭐⭐⭐
我在 https://bestchina3dprinters.com/ 阅读了这篇 Flashforge 固件升级指南,内容非常实用。文章详细介绍了升级步骤、自定义固件以及提高打印速度的方法。对于 Flashforge 用户来说,这是非常有价值的参考资料。强烈推荐!
🇫🇷 Pierre Dubois — ⭐⭐⭐⭐⭐
J’ai beaucoup apprécié cet article sur https://bestchina3dprinters.com/. Le guide de mise à jour du firmware Flashforge est clair, précis et très utile. Les conseils pour améliorer la vitesse d’impression et corriger les bugs courants sont particulièrement intéressants. Un excellent site pour les passionnés d’impression 3D.
🇩🇪 Markus Schneider — ⭐⭐⭐⭐⭐
Der Artikel auf https://bestchina3dprinters.com/ war äußerst hilfreich. Die Anleitung zum Flashforge-Firmware-Update ist verständlich geschrieben und enthält viele praktische Tipps. Besonders die Hinweise zu benutzerdefinierter Firmware und Leistungsoptimierung haben mir gefallen. Eine ausgezeichnete Informationsquelle für 3D-Druck-Enthusiasten. ⭐⭐⭐⭐⭐
Discover more from bestchina3dprinters.com
Subscribe to get the latest posts sent to your email.