 Skip to content
 Anycubic Photon Mono X2 Review – Specs, Price & 4K Performance

Whether you are a seasoned maker or just getting started with resin printing, the Anycubic Photon Mono X2 has likely already popped up on your radar. This guide covers everything you need to know — specs, build volume, resin settings, setup, and how it stands up against its predecessor.
1. Introduction to Anycubic Photon Mono X2
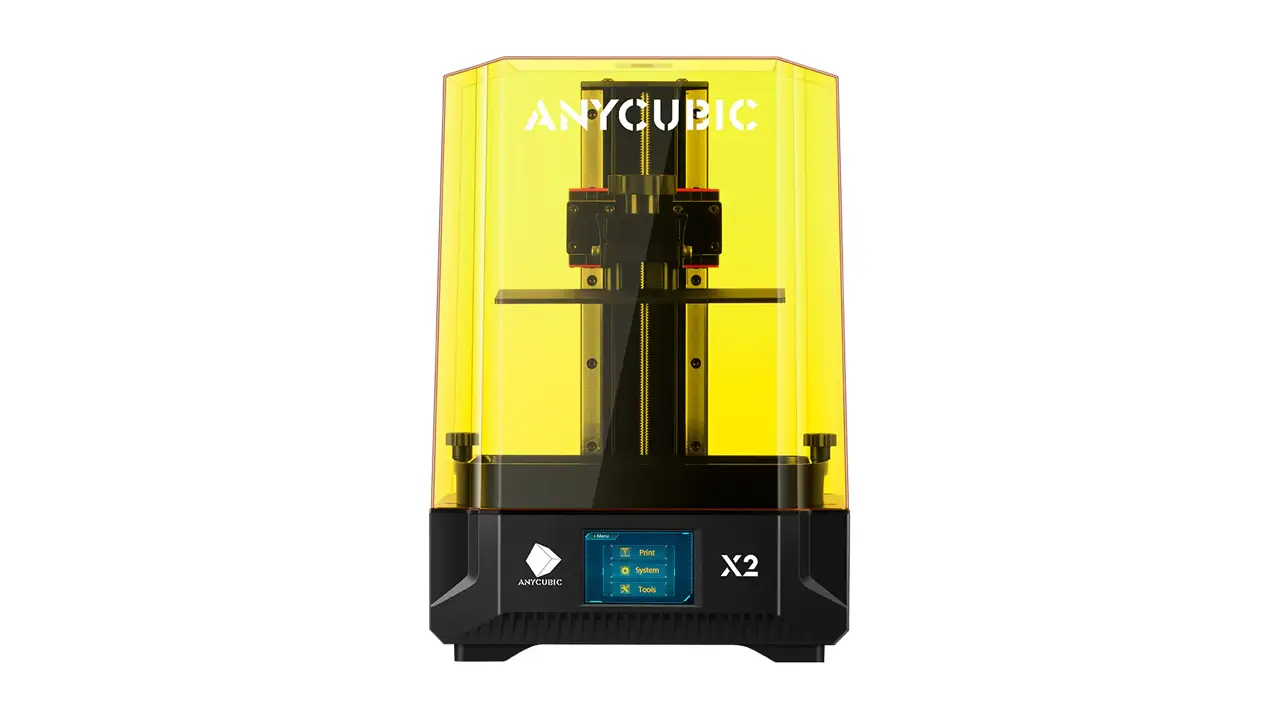
The Anycubic Photon Mono X2 is a mid-size MSLA (Masked Stereolithography Apparatus) resin 3D printer produced by Anycubic, one of the most recognized brands in the consumer 3D printing market. Released as a refined successor to the well-loved Photon Mono X, the X2 builds on that foundation with a larger 9.1-inch 4K+ monochrome screen, an upgraded LighTurbo matrix light source, and a more stable dual-rail Z-axis system.
In 2026, the Anycubic Photon Mono X2 continues to attract attention because it occupies a sweet spot in the market: it offers a genuinely large build volume and impressive resolution without pushing into the premium price territory. For tabletop miniature enthusiasts, product designers, dental technicians, and hobbyists who want to print bigger and more detailed objects in a single session, this printer consistently comes up as a top recommendation.
What makes the X2 particularly compelling is that Anycubic did not just slap a new model number on old hardware. The company addressed specific pain points from the original Mono X — screen uniformity, Z-axis wobble, and build plate adhesion — and delivered meaningful improvements across all three. Let us dig into every detail.
2. Anycubic Photon Mono X2 Specs Explained
Before talking about real-world performance, it helps to understand exactly what hardware you are working with. The table below summarizes the official Anycubic Photon Mono X2 specs as published by Anycubic.
| Specification | Detail |
|---|---|
| Technology | MSLA (LCD Photopolymerization) |
| LCD Screen Size | 9.1 inches (monochrome) |
| Screen Resolution | 4,096 × 2,560 px (4K+) |
| XY Resolution | 48 μm |
| Z Resolution | 10 μm (minimum layer height) |
| Build Volume | 196 × 122 × 200 mm (W × D × H) |
| Light Source | LighTurbo Matrix UV LED (405 nm) |
| Screen Contrast Ratio | 350:1 |
| Screen Light Transmittance | 5% |
| LCD Lifespan (typical) | 2,000 hours |
| Print Speed | Up to 60 mm/h |
| Z-Axis | Dual linear guides + POM clearance nut |
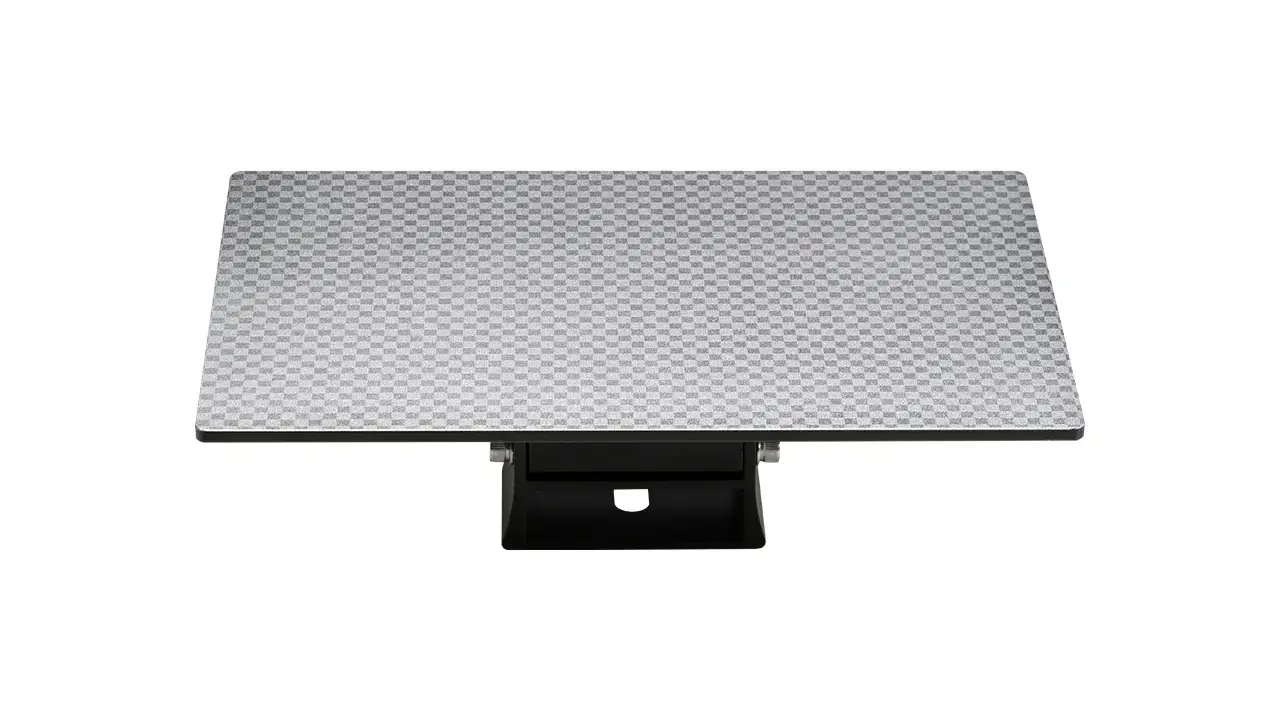
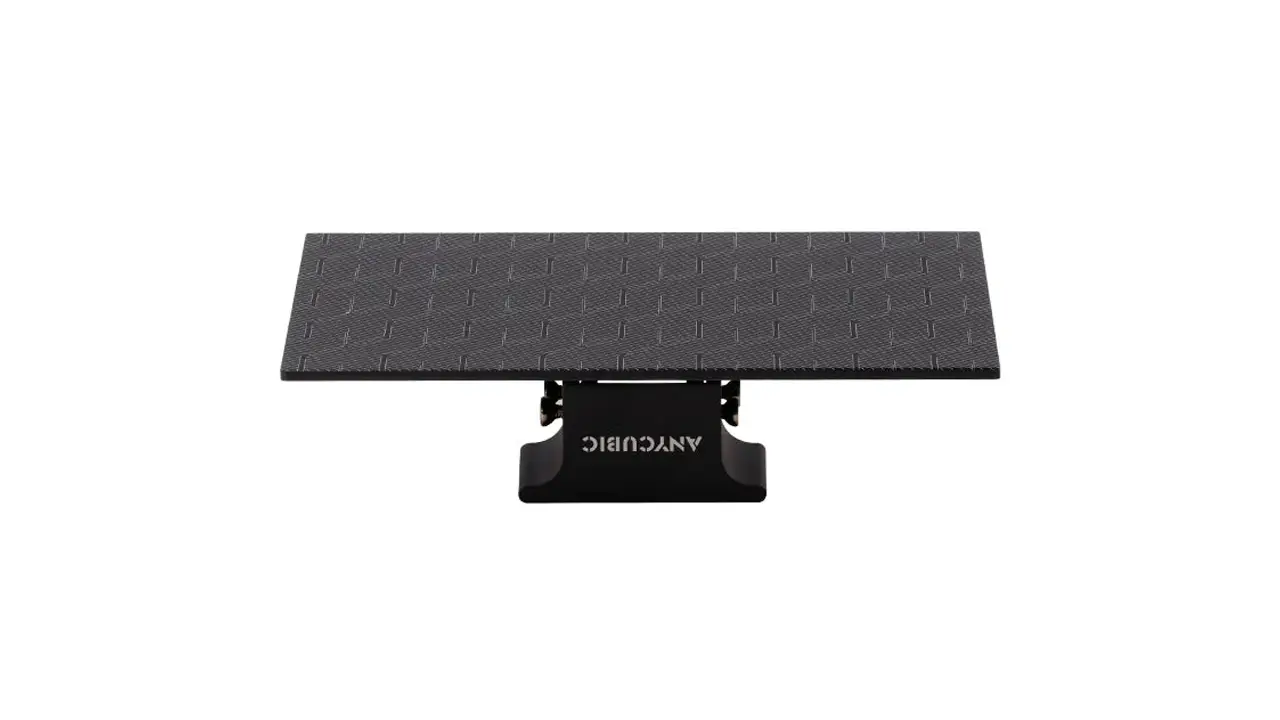
| Build Plate | Laser-engraved aluminum alloy (checkerboard texture) |
| Touchscreen | 3.5-inch TFT color touchscreen |
| Connectivity | USB |
| Slicing Software | Photon Workshop (free), CHITUBOX, Lychee Slicer |
| Compatible Resin | Standard, ABS-like, water-washable, flexible, transparent, dental |
| Machine Dimensions | 417 × 290 × 260 mm |
| Machine Weight | ~7 kg |
| Power Input | 100–240 V AC, 50/60 Hz |
A few things stand out immediately. The dual linear guide system on the Z-axis is a hardware upgrade that matters enormously in practice — it suppresses the micro-vibrations that cause layer lines and shifting. The POM (polyoxymethylene) clearance nut further damps any slack in the lead screw, so vertical movement stays consistent even at higher print speeds.
The UV light source deserves special mention as well. Anycubic’s LighTurbo Matrix projects UV at both parallel and perpendicular angles to the LCD. Most budget resin printers use a simple parallel array, which can create brighter spots near the center and dimmer corners. The perpendicular component fills in those gaps, giving you a much more even cure across the full 196 × 122 mm print area. This directly translates to fewer failed prints and more consistent surface quality edge-to-edge.
3. 4K Resin Printing Technology
The headline feature of the Anycubic Photon Mono X2 4K resin printer is, naturally, its screen. A 9.1-inch monochrome panel running at 4,096 × 2,560 pixels sounds impressive on paper, and in use it absolutely delivers. Each pixel covers just 48 microns — for context, that is smaller than a single grain of fine salt and roughly four times more detailed than a typical FDM 3D printer layer.
The term “4K+” is used by Anycubic because the horizontal resolution of 4,096 pixels matches the 4K standard, but the aspect ratio and total pixel count differ from the consumer 4K display standard (3,840 × 2,160). In practical terms, this means the panel is optimized for the wide, rectangular print bed — every pixel is being used efficiently for your models rather than wasted on a letterboxed format.
Why Monochrome Matters
Older resin printers used RGB LCD panels. Monochrome panels pass more UV light per pixel because they lack the color filter layer, resulting in significantly faster layer cure times — the X2 achieves full layer curing in approximately 2 seconds for standard resin. This shorter exposure cycle is what allows the 60 mm/h print speed. Monochrome screens also last considerably longer (the X2’s screen is rated at 2,000 hours) compared to older RGB panels that degraded much faster under UV stress.
The Anycubic Photon Mono X2 screen resolution advantage is most visible when printing miniatures, jewelry masters, or anatomical models — anything with fine surface textures, thin walls, or undercuts that need crisp definition. Text as small as 1 mm tall is legible on finished prints, which speaks to the XY precision of the system.
4. Build Volume and Printing Capacity
The Anycubic Photon Mono X2 build volume is 196 × 122 × 200 mm, which equals approximately 4.8 liters of printable space. In human terms, that is enough room to print a character bust at 1:4 scale in a single job, or to batch-print 30–40 tabletop miniatures simultaneously.
| What Fits in the Build Volume | Approximate Size | Typical Quantity per Batch |
|---|---|---|
| Tabletop miniatures (28 mm scale) | 28–35 mm tall | 30–40 figures |
| Character busts (1:10 scale) | ~170 mm tall | 1 per batch |
| Dental models (full arch) | ~100 × 80 mm | 2–3 arches |
| Jewelry ring masters | 20–30 mm | 20–30 rings |
| Action figure parts | Varies | Multiple per plate |
The 200 mm Z-height is generous compared to many competitors in the same price class. A tall statue, a vase-mode architectural model, or a life-size hand prop can be printed in a single run rather than requiring splitting and gluing. The 3.8% larger print area compared to the original Mono X (noted officially by Anycubic) may sound modest, but across a large batch print it adds up to meaningful extra capacity — another row of miniatures or an extra dental model per session.
One practical note: as the print volume grows, the forces applied to the FEP film during each layer lift increase. The X2’s dual rail Z-axis handles this gracefully, maintaining consistent peel force from the first layer to the last.
5. Printing Speed and Productivity
The official Anycubic Photon Mono X2 printing speed ceiling is 60 mm/h, which places it ahead of many printers in its class. The monochrome screen is the key enabler here — its high UV transmittance means resins cure faster with less total exposure energy needed per layer.
In practice, the actual speed depends heavily on resin type, layer height, and exposure settings. At a typical 0.05 mm layer height with standard Anycubic resin, real-world speeds are comfortably around 40–50 mm/h for most prints. At 0.1 mm layers the effective speed climbs further, though fine detail suffers at thicker layers. For most hobby use cases, 50 mm/h is a realistic and consistent figure.
Speed vs. Quality Trade-off
The X2 handles this trade-off gracefully. Light exposure can be tuned from about 1.5 seconds per layer (fast, slightly softer detail) up to 3–4 seconds (slower, maximum crispness). Most users find that 2–2.5 seconds per layer at 0.05 mm strikes an excellent balance of speed and quality. At these settings, a plate full of 28 mm miniatures typically completes in 2–3 hours.
Compared to FDM printers that measure speed in millimeters per second of filament travel, MSLA printing is fundamentally different: the entire layer is cured at once regardless of its cross-sectional area. This means printing 10 miniatures takes almost exactly the same time as printing 1, as long as they share the same height. This batch efficiency is one of the most underappreciated advantages of resin printing in general, and the X2’s large plate maximizes it.
6. Setup and First Print
The Anycubic Photon Mono X2 setup process is one of the friendlier in the mid-size resin printer category. The printer ships almost fully assembled — you remove it from the box, peel off the shipping screen protector, apply the included fresh anti-scratch film, attach the resin vat, and level the build plate. First print typically takes under 30 minutes from unboxing.
Step-by-Step First Setup
- Unbox and place the printer on a flat, stable surface with adequate ventilation. Resin fumes require airflow — a window or ventilation fan is recommended.
- Apply the screen protector included in the box. This anti-scratch film protects the LCD from accidental resin contact and extends screen lifespan. The shipping protector must be removed first.
- Attach the resin vat by sliding it into the printer body and securing the thumb screws.
- Level the build plate. Remove the vat, place the included paper on the LCD, loosen the four adjustment screws on the build plate sides, and home the Z-axis using the touchscreen (Tools → Move Z → Home). Press the build plate evenly to the glass, tighten the screws, then set Z=0 on the touchscreen.
- Pour resin. Shake the resin bottle well, then pour into the vat up to the MAX fill line. Always wear gloves and a mask during this step.
- Prepare your print file. Use Photon Workshop (free, available on Anycubic’s website), CHITUBOX, or Lychee Slicer. Export as a .pwmx file for the X2.
- Load via USB and select the file on the 3.5-inch touchscreen.
- Start printing and monitor the first few layers to confirm adhesion.
Anycubic includes two pre-sliced test files on the bundled USB drive. Running one of these before your own models is a smart way to confirm the machine is leveled correctly and producing the expected detail quality.
Post-Print Workflow
After printing, prints must be cleaned in isopropyl alcohol (IPA, 90%+ recommended) or a dedicated wash station to remove uncured resin, then post-cured under UV light for final hardening. Anycubic’s own Wash & Cure stations are designed to work well with the X2’s build plate dimensions.
7. Recommended Resin Settings
Dialing in your Anycubic Photon Mono X2 resin settings is one of the most important steps for getting great results. The values below are based on Anycubic’s officially published profiles and widely validated community data for use with this printer. Always treat these as starting points — actual settings may vary based on your environment temperature and specific resin batch.
| Resin Type | Layer Height | Normal Exposure | Bottom Exposure | Bottom Layers | Lift Speed |
|---|---|---|---|---|---|
| Standard Resin | 0.05 mm | 2.0 – 2.5 s | 35 – 45 s | 4 – 6 | 3 mm/s |
| ABS-Like Resin | 0.05 mm | 2.5 – 3.0 s | 40 – 50 s | 5 – 8 | 2.5 mm/s |
| Water-Washable Resin | 0.05 mm | 2.0 – 2.8 s | 35 – 45 s | 4 – 6 | 3 mm/s |
| Flexible / Rubber-Like | 0.05 mm | 3.0 – 4.0 s | 40 – 55 s | 6 – 8 | 2 mm/s |
| Transparent Resin | 0.05 mm | 2.0 – 2.5 s | 30 – 40 s | 4 – 6 | 3 mm/s |
Important Setting Notes
Bottom exposure time is intentionally much higher than normal exposure because the first layers need to bond firmly to the build plate. Too few bottom layers or too short a bottom exposure causes print failures where the model detaches mid-print. Conversely, over-exposed bottom layers create elephant-foot distortion — swollen bases that make flat surfaces inaccurate.
Lift speed is another commonly overlooked variable. ABS-like and flexible resins are more viscous and create stronger suction against the FEP film during each layer separation. Reducing lift speed from 3 mm/s to 2–2.5 mm/s significantly reduces delamination and failed prints when using these denser materials.
Room temperature affects curing: in cold environments (below 20°C / 68°F) resin becomes more viscous and may require slightly longer exposure times. Running the printer in a temperature-controlled space or warming the resin bottle in warm water before use will improve consistency.
8. Anycubic Photon Mono X2 vs Mono X
The Anycubic Photon Mono X2 vs Mono X comparison is a natural question for anyone upgrading from the first generation or shopping between used and new units. Here is how the two compare across the most important dimensions.
| Feature | Photon Mono X (Gen 1) | Photon Mono X2 | Verdict |
|---|---|---|---|
| Screen Size | 8.9 inches | 9.1 inches | X2 slightly larger |
| Resolution | 3,840 × 2,400 px | 4,096 × 2,560 px | X2 higher (4%) |
| XY Resolution | 50 μm | 48 μm | X2 marginally finer |
| Build Volume | 192 × 120 × 250 mm | 196 × 122 × 200 mm | Mono X taller; X2 wider |
| Z-Axis System | Single linear guide | Dual linear guides + POM nut | X2 more stable |
| Light Source | LighTurbo Matrix (v1) | LighTurbo Matrix (improved) | X2 more uniform |
| Build Plate | Standard sandblasted | Laser-engraved checkerboard | X2 better adhesion |
| Screen Protector | Not included | Included | X2 better value |
| Print Speed | ~50 mm/h | Up to 60 mm/h | X2 faster |
The summary is nuanced. The Photon Mono X actually has 50 mm more Z-height (250 mm vs 200 mm), which matters if you frequently print very tall objects. However, on nearly every other metric — resolution, stability, light uniformity, build plate adhesion, and speed — the X2 is the better machine. If you do not regularly print objects taller than 200 mm, the X2 is the clear upgrade. If tall single-piece prints are your main use case, the extra Z height of the original Mono X may still be relevant.
9. Price and Market Position
The Anycubic Photon Mono X2 price has settled into a competitive range since its launch. Anycubic has periodically offered the printer at sale prices around $309–$350 USD through its official store. At full retail, it typically sits in the $350–$399 range, occasionally dipping lower during promotional events.
| Printer | Approx. Price (USD) | Build Volume | Resolution | Best For |
|---|---|---|---|---|
| Anycubic Photon Mono X2 | $309 – $399 | 196 × 122 × 200 mm | 4K+ (48 μm XY) | Mid-size quality prints |
| Anycubic Photon Mono 2 | ~$200 – $250 | 165 × 89 × 143 mm | 4K+ (34 μm XY) | Budget / beginners |
| Anycubic Photon Mono X 6K | ~$450 – $550 | 196 × 122 × 245 mm | 6K (34 μm XY) | Ultra-detail professionals |
| Elegoo Saturn 2 | ~$350 – $450 | 218 × 123 × 260 mm | 8K (28 μm XY) | Large-format high detail |
In market terms, the Photon Mono X2 sits in the middle of Anycubic’s own lineup — above entry-level machines like the Photon Mono 2, and below the higher-resolution Photon Mono X 6K. Against third-party competitors, it holds its own on build volume and price, though some rivals in the same price bracket now offer 8K resolution panels. The X2 prioritizes balanced reliability and proven performance over chasing the highest resolution spec.
For buyers who want a dependable, well-supported machine with a large print area and excellent detail quality at a price that does not feel like a gamble, the Anycubic Photon Mono X2 represents strong value for money in 2026.
10. Final Verdict – Is the Anycubic Photon Mono X2 Worth It?
After reviewing the specs, the technology, the competition, and the real-world performance data, the conclusion is clear: the Anycubic Photon Mono X2 earns its place as a recommended mid-size resin printer in 2026.
Pros
- Large 9.1-inch 4K+ monochrome screen with 48 μm XY resolution
- Improved LighTurbo UV matrix for even, consistent curing across the whole plate
- Dual linear Z-axis guides with POM nut for stable, wobble-free vertical movement
- Generous 196 × 122 × 200 mm build volume — ideal for batch printing
- Fast 60 mm/h maximum print speed; ~40–50 mm/h in practice
- Laser-engraved checkerboard build plate for reliable adhesion and easy model removal
- Anti-scratch LCD film included in the box
- Compatible with Photon Workshop, CHITUBOX, and Lychee Slicer
- Supportive Anycubic community and regularly updated firmware
Cons
- Z-height (200 mm) is 50 mm shorter than the original Photon Mono X
- USB-only connectivity (no Wi-Fi)
- Photon Workshop slicer has no native Linux support
- Resin printing requires safety equipment and good ventilation — not a plug-and-play hobby
- Newer competitors offer 6K or 8K resolution at similar price points
Who Should Buy the Anycubic Photon Mono X2?
This printer is an excellent choice for tabletop gaming enthusiasts who want to batch-print armies of miniatures, for product designers who need accurate prototypes up to 200 mm tall, for dental lab technicians looking for an affordable but precise MSLA platform, and for any maker who has outgrown smaller resin printers and wants more build volume without stepping up to professional pricing.
Who Might Want to Look Elsewhere?
If maximum resolution is your priority (for example, jewelers who need 28–34 μm XY detail), the Anycubic Photon Mono X 6K or a competing 8K printer may serve you better. If you primarily print very tall single-piece models (over 200 mm), the Z-height limitation of the X2 is worth considering — the older Mono X, or a larger format printer, would give you more headroom.
Final Score and Recommendation
The Anycubic Photon Mono X2 earns a strong recommendation. It delivers on all of its headline promises: crisp 4K+ detail, a large and well-lit print area, stable motion, and reliable prints when set up correctly. At its typical street price of around $309–$399, it offers a compelling combination of capability and value that is hard to beat in its class. If you are ready to commit to resin printing and want a machine that will not frustrate you with instability or poor print uniformity, the Photon Mono X2 deserves a serious look.
If you’re also exploring powerful Chinese tech beyond 3D printers, take a look at the new Honor MagicBook Pro 16 (2026) with RTX 5070. It combines serious performance with sleek design and next-gen graphics. Full specs and details here: https://bestchinagadget.com/honor-magicbook-pro-16-2026-rtx-5070/
Anycubic Photon Mono X2Anycubic Photon Mono X2Anycubic Photon Mono X2Anycubic Photon Mono X2Anycubic Photon Mono X2Anycubic Photon Mono X2Anycubic Photon Mono X2Anycubic Photon Mono X2Anycubic Photon Mono X2Anycubic Photon Mono X2Anycubic Photon Mono X2Anycubic Photon Mono X2Anycubic Photon Mono X2Anycubic Photon Mono X2Anycubic Photon Mono X2Anycubic Photon Mono X2Anycubic Photon Mono X2Anycubic Photon Mono X2Anycubic Photon Mono X2Anycubic Photon Mono X2Anycubic Photon Mono X2
Related
Discover more from bestchina3dprinters.com
Subscribe to get the latest posts sent to your email.
