 Skip to content
 Best FDM Slicing Software Compared in 2026

Orca-Flashforge: The Ultimate Guide to Better, Faster 3D Printing
Orca-Flashforge: The Ultimate Guide to Better, Faster 3D Printing If you’ve been 3D printing for a while, you’ve probably heard […]

QIDI Slicer: Complete Guide to QIDI 3D Printer Slicing Software
QIDI Slicer: Complete Guide to QIDI 3D Printer Slicing Software 1. What Is QIDI Slicer If you own a QIDI […]

OrcaSlicer Review: Powerful Open Source 3D Printing Slicer
OrcaSlicer Review: Powerful Open Source 3D Printing Slicer What Is OrcaSlicer? If you’ve spent any time in the 3D printing […]

Cura Slicer: Features, Settings and Ultimaker Cura Guide
Cura Slicer: Features, Settings and Ultimaker Cura Guide 1. What Is Cura Slicer? If you have ever been curious about […]

Creality Print Software Review: Features, Setup and Settings
Creality Print Software Review: Features, Setup and Settings Creality Shenzhen, China 3D Printers & Accessories The world’s most popular 3D […]

Bambu Studio – Powerful Slicer for Bambu Lab 3D Printers
Bambu Studio – Powerful Slicer for Bambu Lab 3D Printers Introduction to Bambu Studio If you have ever explored the […]

MSLA Slicer Comparison: Lychee vs Chitubox vs Photon
MSLA Slicer Comparison: Lychee vs Chitubox vs Photon Introduction to Resin Slicer for MSLA Printing If you’ve ever pulled a […]
Compare Bambu Studio, OrcaSlicer, Cura, and Creality Print to find the perfect FDM slicer for your workflow.
1. What Is the Best FDM Slicing Software in 2026?
If you’ve spent any time in the 3D printing world, you already know that the printer itself is only half the story. The real magic — or frustration — begins with your slicer. FDM slicer software is the bridge between a digital model and a physical object. It takes your STL or 3MF file, analyzes every millimeter of geometry, and translates it into a language your printer understands: G-code.
In 2026, the landscape of FDM slicing software is richer and more competitive than ever. Four names consistently rise to the top of community discussions, professional workflows, and beginner tutorials: Bambu Studio, OrcaSlicer, Ultimaker Cura, and Creality Print. Each of them has carved out a distinct niche, and the best choice genuinely depends on what kind of printer you own, how much experience you have, and how deeply you want to dive into settings.
This guide is your friendly, in-depth companion for navigating all four options. Whether you’re printing your very first Benchy or dialing in a complex multi-material production run, by the end of this article you’ll have a crystal-clear picture of which slicer deserves a permanent spot in your workflow.
2. How FDM Slicer Software Converts Models into G-code
Before we compare specific applications, it helps to understand what slicing software actually does under the hood. The term “slicing” is literal: the software mathematically cuts your 3D model into hundreds or thousands of horizontal layers, each corresponding to one pass of the print head.
For each of those layers, the slicer must calculate:
Perimeters (walls): The outer shells of your object that define surface quality and structural integrity. Most slicers let you specify wall count, line width, and print order.
Infill: The internal structure that gives your part strength without using solid plastic throughout. Slicers offer dozens of infill patterns — gyroid, honeycomb, lightning, cubic — and let you tune density from 0% (hollow) to 100% (solid).
Support structures: Overhanging geometry that would otherwise print in mid-air needs temporary scaffolding. Slicers calculate support placement automatically, though power users often paint supports manually for cleaner removal.
Travel moves: When the nozzle moves without extruding, the slicer plans the most efficient path to minimize stringing and oozing.
Temperature and speed commands: Every change in print speed, fan speed, or nozzle temperature is encoded as a specific G-code command in the output file.
The final G-code file is a sequential list of machine instructions — essentially coordinates and commands — that your printer firmware executes line by line. A well-configured slicer means faster prints, cleaner surfaces, fewer failures, and less wasted filament. A poorly configured one means hours of babysitting a print only to watch it fail at layer 47.
Modern slicers have also added capabilities beyond basic slicing: variable layer height, adaptive infill, pressure advance calibration, color change automation, and cloud connectivity. Understanding these features is what separates a competent user from someone who just hits “Slice” and hopes for the best.
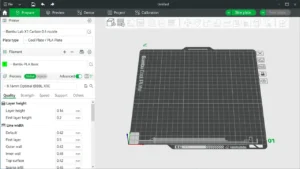
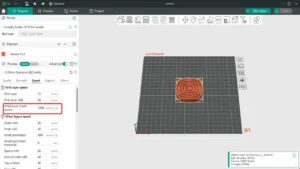
3. Bambu Studio Slicer: Speed Meets Automation
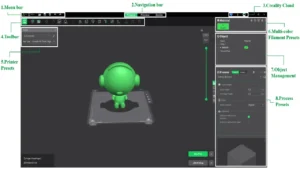
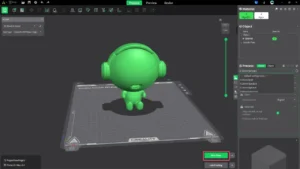
Bambu Lab entered the consumer 3D printing market in 2022 and immediately disrupted everything. Their printers were fast, their ecosystem was polished, and their slicer — Bambu Studio — reflected that same philosophy: make things work beautifully without asking too much of the user.
Bambu Studio is based on the open-source PrusaSlicer codebase but has been significantly modified and extended by Bambu Lab’s development team. The interface is clean and modern, with a dark-themed workspace that feels premium compared to some older alternatives.
Key features of Bambu Studio:
Auto-calibration integration: Bambu Studio communicates directly with Bambu Lab printers to trigger automatic calibration routines — flow rate calibration, vibration compensation (input shaping), and first-layer calibration. This automation removes a major barrier for beginners who might otherwise spend hours manually tuning prints.
AMS (Automatic Material System) support: If you own a Bambu printer with the AMS accessory, Bambu Studio provides a visual interface for assigning colors to different model parts, managing filament slots, and automating multi-color purging. The color painting tools are among the best in any slicer.
Preset profiles: Bambu Studio ships with hundreds of pre-tested profiles for Bambu Lab printers and a growing library for third-party machines. These profiles are conservative enough to be reliable but well-optimized for speed.
Process settings: The slicer separates “global” print settings from “object-level” settings, letting you assign different layer heights, infill densities, or support strategies to individual objects in the same build plate. This is incredibly useful for mixed builds.
Bambu Handy and cloud connectivity: Bambu Studio integrates with Bambu’s cloud ecosystem, allowing remote monitoring, print job management, and AI-powered failure detection via the printer’s built-in camera.
Who is Bambu Studio for? Primarily Bambu Lab printer owners, though it does support other printers. If you value speed, automation, and a polished multi-material workflow, Bambu Studio is hard to beat. It lowers the technical ceiling significantly, making professional-quality prints accessible to near-beginners.
The one criticism leveled at Bambu Studio is its tight coupling to Bambu’s ecosystem and cloud services. Power users who prefer full local control or who use non-Bambu hardware may find the experience less compelling.
4. OrcaSlicer Download and Power Features
OrcaSlicer is the slicer that the 3D printing community quietly fell in love with. Originally a fork of Bambu Studio (which itself is a fork of PrusaSlicer), OrcaSlicer has grown into a fully independent open-source project with its own development roadmap, community, and feature set.
You can download OrcaSlicer from its official GitHub repository, where releases are published regularly for Windows, macOS, and Linux. The installation is straightforward, and the first launch presents you with a familiar interface that will feel comfortable to anyone who has used PrusaSlicer or Bambu Studio.
What makes OrcaSlicer stand out:
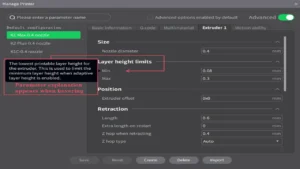
Built-in calibration tools: OrcaSlicer includes a comprehensive suite of print-in-place calibration tests — flow rate, pressure advance, temperature towers, retraction, tolerance tests, and more. These are baked directly into the slicer menu, meaning you can run a calibration test with two clicks rather than hunting for external files.
Printer agnostic: Unlike Bambu Studio, OrcaSlicer does not favor any single printer brand. It has robust profile support for Bambu Lab, Creality, Prusa, Voron, BambuLab, Sovol, and hundreds of other machines. Community-contributed profiles are regularly merged into official releases.
Advanced wall generation: OrcaSlicer offers arachne (variable-width) perimeter generation, precise wall ordering control, and overhang-specific speed settings that let you slow down automatically on steep overhangs for cleaner results without touching the rest of your print speed.
Seam painting: Manual seam control in OrcaSlicer is excellent. You can paint specific faces of your model to attract or repel seams, giving you precise control over where layer-start artifacts appear — critical for aesthetic parts.
Multi-material support: OrcaSlicer supports multi-filament workflows with detailed purge tower configuration, filament-specific temperature control, and Bambu AMS compatibility (yes, you can use OrcaSlicer with a Bambu printer and AMS).
Support painting: Like Bambu Studio, OrcaSlicer allows manual painting of support regions, but adds extra refinement options like support interface layers and configurable contact Z distance per painted region.
Who is OrcaSlicer for? Enthusiasts and advanced users who want maximum control without sacrificing a modern, usable interface. It’s the best FDM slicing software for people who love dialing things in precisely and appreciate a slicer that keeps pace with cutting-edge community techniques. The frequent release cadence means new features arrive quickly.
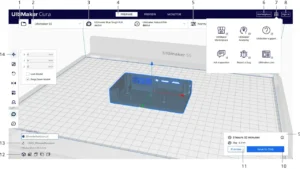
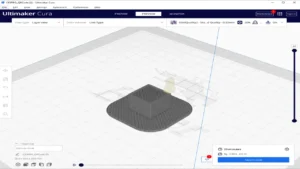
5. Cura Slicer Settings Explained
Ultimaker Cura is arguably the most widely used FDM slicer in the world. It has been around since 2014, and over the years it has accumulated a staggering number of settings — over 400 configurable parameters — while maintaining an approachable beginner interface that hides most of that complexity behind “Recommended” and “Custom” modes.
Cura is developed by Ultimaker (now UltiMaker after the merger with MakerBot) and is released as free, open-source software available for Windows, macOS, and Linux.
Understanding Cura’s interface layers:
Recommended mode: A simplified view presenting only the most impactful settings — layer height, infill density, support on/off, and adhesion type. This is where beginners live, and Cura does an excellent job making these choices intuitive.
Custom mode: The full power of Cura’s 400+ settings, organized into categories like Quality, Walls, Top/Bottom, Infill, Material, Speed, Travel, Cooling, Support, and Build Plate Adhesion. Each setting has a tooltip explanation, and settings that affect other settings are visually linked with dependency indicators.
Profiles and presets: Cura ships with manufacturer-specific profiles for a huge range of printers — Creality, Prusa, Artillery, Anycubic, and naturally UltiMaker’s own hardware. You can save custom profiles, import community profiles, and share them easily.
Plugins and Marketplace: Cura’s Marketplace is one of its killer features. Hundreds of community-developed plugins add functionality like: automated support blockers, tree support enhancements, layer inspection tools, direct OctoPrint integration, and thumbnail generation for printer screens. This extensibility keeps Cura relevant even as newer slicers emerge.
Notable Cura slicer settings worth mastering:
Variable Layer Height: Cura’s adaptive layer height tool automatically uses thicker layers on flat surfaces and finer layers on curved surfaces, dramatically reducing print time on complex models with minimal quality loss.
Tree Supports: Cura popularized organic tree-support structures that branch up from the build plate and contact the model only where needed. They use less material and leave cleaner contact surfaces than traditional grid supports.
Fuzzy Skin: A fun surface texture option that adds controlled randomness to outer walls, creating a matte, rough appearance that hides layer lines on aesthetic parts.
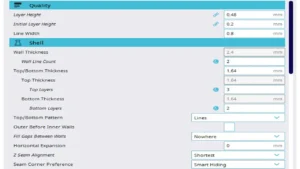
Z Seam Alignment: Detailed control over where layer changes occur, with options for sharpest corner, user-specified, shortest path, and random distribution.
Who is Cura for? Almost everyone, but particularly users with a wide variety of non-proprietary printers, people who value community plugins, and those who prefer a highly documented, stable platform. Cura’s update cadence has slowed compared to OrcaSlicer in recent years, but its maturity and plugin ecosystem keep it highly relevant.
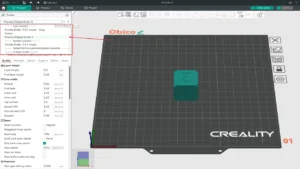
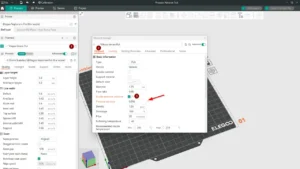
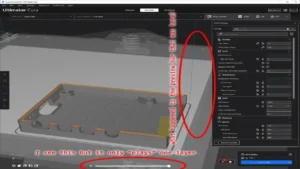
6. Creality Print Software: Is It Enough?
Creality Print is Creality’s proprietary slicing software, developed primarily for their own lineup of printers — the Ender series, CR series, K1 series, and others. It is a free download available on Creality’s official website and has undergone significant improvements since its initial release.
Creality Print is based on the same underlying Cura engine, which means its core slicing logic is familiar. The interface, however, has been redesigned with a focus on Creality printer owners, featuring built-in printer profiles optimized specifically for Creality hardware.
What Creality Print does well:
Seamless Creality integration: For K1, K1 Max, and Ender-3 V3 series owners, Creality Print offers direct Wi-Fi connectivity, live camera monitoring, and one-click printing that rivals the experience of Bambu Studio for Bambu owners. The integration is genuinely smooth.
Simplified interface: Creality Print targets beginners and intermediate users. The settings are less overwhelming than Cura’s full custom mode, making it a reasonable starting point for new Creality printer owners.
AI-powered features (K1 series): With compatible printers, Creality Print can interface with the printer’s AI camera system for spaghetti detection and print failure alerts.
Pre-configured profiles: Every Creality printer in the current lineup has an optimized profile included, meaning new users can start printing good-quality parts very quickly.
Where Creality Print falls short:
The honest assessment is that Creality Print is a convenience-focused slicer for Creality hardware owners. Its advanced settings are more limited than OrcaSlicer or Cura, its plugin ecosystem doesn’t exist at the same level, and it offers little reason to use it on non-Creality printers. Experienced users often outgrow it and migrate to Cura or OrcaSlicer while retaining Creality’s printer profiles.
Who is Creality Print for? New Creality printer owners who want a plug-and-play experience with their specific hardware. It’s the best first slicer if you just unboxed an Ender or K1 and want to print something today without a steep learning curve.

Want to transfer real objects into the digital world in minutes? The Creality CR-Scan Ferret SE 3D Scanner is a compact and accurate solution for 3D scanning without complicated setup.
High detail, fast data processing, and convenient connectivity make it an excellent tool for designers, engineers, makers, and small businesses. Scan details, faces, interior items, or prototypes — and immediately send the model to CAD or 3D printing.
CR-Scan Ferret SE combines mobility, accuracy, and speed in one device. Minimal preparation, maximum results.
👉 For more details and the latest information, visit:
https://bestchina3dprinters.com/recommends/creality-cr-scan-ferret-se-3d-scanner/
Create digital copies of the real world — quickly and professionally.
7. 3D Printing Slicer Comparison Table
Here is a direct head-to-head comparison of all four slicers across the most important criteria:
| Feature | Bambu Studio | OrcaSlicer | Cura | Creality Print |
|---|---|---|---|---|
| License | Proprietary / Open core | Open source (AGPL) | Open source (LGPL) | Proprietary (free) |
| OS Support | Win / macOS / Linux | Win / macOS / Linux | Win / macOS / Linux | Win / macOS |
| Best For | Bambu Lab owners, multi-color | Power users, all brands | Universal, plugin lovers | Creality beginners |
| UI Complexity | Low–Medium | Medium–High | Low–Very High | Low |
| Multi-Material | Excellent (AMS) | Excellent | Good | Limited |
| Built-in Calibration | Yes (auto) | Yes (manual tools) | Via plugins | Basic |
| Plugin / Extension Support | Limited | Community forks | Excellent (Marketplace) | None |
| Cloud / Remote Printing | Yes (Bambu Cloud) | Local / optional | Via OctoPrint plugin | Yes (Creality Cloud) |
| Printer Compatibility | Bambu + limited 3rd party | Very broad | Extremely broad | Creality focused |
| Update Frequency | Regular | Very frequent | Moderate | Moderate |
| Community Size | Large (growing) | Large (very active) | Massive | Medium |
| Price | Free | Free | Free | Free |
8. Best Slicer for FDM Printers by Skill Level
One of the most common questions new 3D printing enthusiasts ask is simply: “Which slicer should I start with?” The answer is genuinely different depending on where you are in your journey.
Complete Beginners
If you are brand new to 3D printing and just want to get objects off the build plate without reading a 200-page manual, your best path depends on your printer. Bambu Lab printer owners should start with Bambu Studio — the automated calibration and intelligent defaults make it almost impossible to get a catastrophically bad print. Creality printer owners should start with Creality Print for the same reason. For everyone else, Cura in Recommended mode is the traditional beginner recommendation and remains excellent: it has the largest tutorial library, the most YouTube videos, and the most forum threads of any slicer, meaning any problem you encounter has almost certainly been documented and solved somewhere online.
The key for beginners is not to get lost in settings. Use a preset profile, start with PLA, pick a layer height of 0.2mm, 15% infill, and hit Slice. You can refine from there once you understand the baseline.
Intermediate Users
Once you’ve printed a few dozen successful objects and you’re starting to ask questions like “why does my overhang look rough?” or “how do I reduce stringing?” — you’re ready to explore Custom mode in Cura or switch to OrcaSlicer. At this stage, understanding the relationship between print speed, temperature, cooling, and retraction becomes genuinely interesting rather than overwhelming.
OrcaSlicer’s built-in calibration tools are especially valuable at this stage. Running a pressure advance calibration test and a flow rate test on a new filament roll is a 20-minute investment that pays dividends across every subsequent print.
Advanced Users and Professionals
Power users who manage fleets of printers, push exotic materials, or run multi-color production workflows will likely end up with OrcaSlicer as their primary tool, possibly supplemented by Bambu Studio for multi-color AMS work. At this level, features like per-object process settings, custom G-code scripting, modifier meshes for region-specific settings, and detailed seam control become the deciding factors.
9. Workflow Optimization: From STL to Perfect Print
Having great slicing software is one thing — using it efficiently is another. Here are the advanced FDM slicing features and workflow strategies that separate good prints from exceptional ones.
Profile Management
Build a library of tested profiles rather than starting from scratch for each print. Create profiles not just per printer, but per filament brand and type. A well-labeled profile like “Bambu PLA Basic — 0.2mm — 250mm/s — fan 100%” saves setup time and ensures repeatability. Both Cura and OrcaSlicer allow profile export/import, making it easy to share profiles with other users or back them up.
Variable Layer Height
Use adaptive layer height on organic or curved models. For a figurine or terrain piece, printing at 0.1mm on curved surfaces and 0.3mm on flat tops can cut print time by 30–40% compared to printing the entire model at 0.1mm, with almost no visible quality difference.
Modifier Meshes and Per-Object Settings
In OrcaSlicer and Bambu Studio, you can import a simple cube or cylinder as a “modifier” that sits inside your model. Any settings assigned to that modifier apply only within that region. This is powerful for: adding extra perimeters around mounting holes without slowing the whole print, using different infill patterns in specific zones, or creating a dense base with a lighter top section.
Multi-Material Slicing
Effective multi-material slicing requires tuning your purge tower carefully. Too small a purge tower means color contamination; too large wastes filament. OrcaSlicer’s flush volume calculator, based on filament color darkness, automates much of this decision. Always do a single-color purge test before committing to a multi-hour color print.
Support Strategy
Tree supports in Cura and organic supports in OrcaSlicer and Bambu Studio have largely replaced traditional grid supports for most geometries. However, for flat overhangs or bridging, normal supports with a carefully tuned Z distance (typically 0.1–0.2mm) often produce cleaner contact surfaces. Experiment with interface layers made from a different material — HIPS or PVA — for the cleanest possible support removal if your printer supports multi-material.
G-code Preview and Validation
Before sending a long print, always do a full G-code preview. Inspect the first five layers for any anomalies, check that supports are where you expect them, verify infill patterns look correct, and use the speed visualization (available in Cura and OrcaSlicer) to identify any unexpectedly slow or fast regions. Five minutes of preview can save five hours of failed printing.
10. Final Verdict: Which Is the Best FDM Slicing Software?
After this deep dive, here is a clear breakdown by use case — because honestly, there’s no single universal winner.
Best for Bambu Lab printer owners: Bambu Studio is the natural choice. Its AMS integration, auto-calibration, and seamless cloud connectivity make it the most friction-free experience possible on Bambu hardware. If you’re deeply embedded in the Bambu ecosystem, OrcaSlicer is an excellent alternative that adds power-user features while maintaining AMS compatibility.
Best for power users and multi-brand setups: OrcaSlicer is the strongest all-around performer in 2026. Its rapid development, built-in calibration suite, excellent profile support for virtually every FDM printer on the market, and active community make it the best FDM slicing software for anyone who takes their 3D printing seriously. It manages to be powerful without being overwhelming.
Best for community, plugins, and universal compatibility: Ultimaker Cura remains the most universally compatible and community-supported slicer. Its Marketplace plugins fill virtually any gap in its feature set, and its tutorial ecosystem is unmatched. If you’re using an obscure printer or you love the idea of extending your slicer with community tools, Cura is your friend.
Best for Creality beginners: Creality Print offers a gentle entry point for new Creality printer owners. It’s not the tool you’ll use forever, but it removes barriers on day one and lets you focus on learning the fundamentals of 3D printing rather than wrestling with unfamiliar software.
The exciting reality of the FDM slicing software landscape in 2026 is that all four of these options are free, all are actively maintained, and all produce excellent G-code when configured correctly. There’s no wrong answer — only the right answer for your specific printer, your specific skill level, and the kind of prints you want to create. Download one, start printing, and enjoy the process.
If you’re interested in cutting-edge Chinese technology beyond 3D printing, take a look at https://autochina.blog/ — a dedicated platform covering the latest Chinese electric vehicles, smart mobility innovations, EV comparisons, and in-depth reviews. From BYD and NIO to XPeng and Zeekr, everything is analyzed with real specs, pricing insights, and future market trends. Stay ahead of the automotive revolution and explore how China is reshaping the global EV industry.
best FDM slicing softwarebest FDM slicing softwarebest FDM slicing softwarebest FDM slicing softwarebest FDM slicing softwarebest FDM slicing softwarebest FDM slicing softwarebest FDM slicing softwarebest FDM slicing softwarebest FDM slicing softwarebest FDM slicing softwarebest FDM slicing softwarebest FDM slicing softwarebest FDM slicing softwarebest FDM slicing softwarebest FDM slicing softwarebest FDM slicing softwarebest FDM slicing softwarebest FDM slicing softwarebest FDM slicing softwarebest FDM slicing softwarebest FDM slicing softwarebest FDM slicing softwarebest FDM slicing software
