 Skip to content
 If you’ve been 3D printing for a while, you’ve probably heard the buzz around Flashforge OrcaSlicer. And if you own a Flashforge printer, you’re in luck — the combination of OrcaSlicer with Flashforge hardware has become one of the most talked-about workflows in the maker community. Whether you’re printing detailed miniatures, functional engineering parts, or rapid prototypes, this guide walks you through everything you need to know about Orca-Flashforge: from installation and profiles to calibration, speed tuning, and troubleshooting.
Let’s dive in.


1. What Is Flashforge OrcaSlicer?
Orca-Flashforge refers to the use of OrcaSlicer — an open-source, feature-rich 3D printing slicer — specifically configured and optimized for Flashforge 3D printers. Think of OrcaSlicer as the brain behind your print: it takes your 3D model and converts it into the precise instructions your printer follows, layer by layer.
Flashforge is a well-established Chinese 3D printer manufacturer known for reliable, consumer-friendly machines like the Adventurer series and the Guider lineup. Their native slicer, FlashPrint, works perfectly fine out of the box, but many users quickly discover that OrcaSlicer unlocks a whole new level of control and print quality — especially for those who want to push their machines beyond stock settings.
OrcaSlicer was originally forked from Bambu Studio and Prusa Slicer, meaning it inherited the best features from both while adding its own powerful calibration tools and multi-printer support. The result is a Flashforge 3D printer slicer experience that feels modern, flexible, and incredibly capable.
The Orca-Flashforge pairing is particularly appealing because:
- OrcaSlicer includes built-in printer profiles for several Flashforge models
- It supports network printing directly to Flashforge printers
- Calibration tools work seamlessly with Flashforge’s hardware
- The interface is clean, intuitive, and well-documented by the community
2. Why OrcaSlicer Became Popular
OrcaSlicer didn’t become popular overnight. It earned its reputation through consistent performance, a responsive development team, and features that genuinely make a difference on the print bed.
Speed Optimization
One of the biggest selling points is how OrcaSlicer handles high-speed printing. Unlike older slicers that simply increase travel speed and hope for the best, OrcaSlicer intelligently manages acceleration curves, jerk values, and input shaping parameters. This means you can print faster without sacrificing dimensional accuracy or surface quality.
Advanced Calibration Tools
Where OrcaSlicer truly shines is its built-in calibration suite. You don’t need to hunt for external tools or manually tweak G-code files. Pressure advance calibration, flow rate testing, temperature towers, and vibration compensation are all baked directly into the slicer interface. This alone is a massive time-saver.
Better UI Compared to Classic Slicers
OrcaSlicer vs FlashPrint is a common discussion in Flashforge communities. FlashPrint is beginner-friendly and does its job, but it’s limited in advanced settings and customization. OrcaSlicer offers a more professional interface with organized settings panels, a real-time 3D preview, layer inspection tools, and per-object settings — all without feeling overwhelming once you spend a few sessions with it.
Community and Updates
The OrcaSlicer GitHub repository is actively maintained, with regular updates, bug fixes, and new printer profiles added frequently. The community around it is helpful, well-organized, and produces an impressive volume of guides, preset packs, and video tutorials.

Orca-Flashforge
Advanced 3D printing solution combining Orca Slicer with Flashforge hardware. Optimized workflow, enhanced print quality, and seamless integration for professional results.
- • Orca Slicer Integration
- • Enhanced Print Quality
- • Optimized Workflow
- • Professional Results
3. Supported Flashforge Printers
OrcaSlicer supports a growing list of Flashforge printers, and the built-in profiles are well-tuned for the most popular models. Here’s a breakdown of currently supported and commonly used machines:
| Printer Model | OrcaSlicer Support | Notable Feature |
|---|---|---|
| Adventurer 5M | Full Support | High-speed CoreXY, 600mm/s max |
| Adventurer 5M Pro | Full Support | Enclosed chamber, multi-material ready |
| Adventurer 4 | Community Profile | Enclosed, auto-leveling |
| Guider 3 Plus | Partial Support | Large format, industrial use |
| Creator 3 Pro | Community Profile | Dual independent extruders (IDEX) |
The OrcaSlicer for Adventurer 5M setup is by far the most mature and well-tested, and most of this guide focuses on that configuration. However, the principles apply broadly across the supported lineup.
4. How to Install Orca-Flashforge
Getting started with the Orca Slicer Flashforge setup is easier than you might expect. Here’s a step-by-step walkthrough:
Step 1 — Download OrcaSlicer
Visit the official OrcaSlicer GitHub releases page and download the latest stable release for your operating system. OrcaSlicer is available for Windows, macOS, and Linux. Always use the latest stable version rather than nightly builds for everyday printing.
Step 2 — Install the Software
Run the installer and follow the on-screen prompts. The installation is straightforward, similar to any desktop application. On macOS, you may need to allow the app through your security settings since it’s not distributed via the App Store.
Step 3 — Launch and Select Your Printer
On first launch, OrcaSlicer will walk you through a setup wizard. When prompted to select a printer:
- Choose “Flashforge” from the manufacturer list
- Select your specific model (e.g., Adventurer 5M)
- Select your nozzle diameter (typically 0.4mm)
- Confirm the build plate size
Step 4 — Configure Network Connection
Flashforge printers support Wi-Fi printing, and OrcaSlicer can connect directly to your printer on the local network. Navigate to the printer settings and enter your printer’s IP address. You can find this on the printer’s touchscreen under Network Settings.
Step 5 — Firmware Compatibility
OrcaSlicer works best with up-to-date firmware. Flashforge regularly releases firmware updates through the FlashForge app or via the printer’s touchscreen menu. For the Adventurer 5M, firmware version 2.4 and above is recommended for full OrcaSlicer compatibility, particularly for features like pressure advance and input shaping.
Step 6 — Import or Enable Built-in Profiles
OrcaSlicer ships with pre-configured Flashforge printing profiles for common materials. In the Filament settings panel, you’ll find ready-to-use PLA, PETG, ABS, and TPU profiles tuned for Flashforge hardware. These are a great starting point before you dial in your own custom settings.
5. Best OrcaSlicer Settings for Flashforge
Once your printer is connected and configured, it’s time to optimize. Here are the best OrcaSlicer settings for Flashforge printers, broken down by key parameter categories:
Layer Height
For general-purpose printing, 0.2mm layer height strikes the best balance between speed and quality. For detailed models or miniatures, drop to 0.1mm or 0.12mm. For draft prints or large structural parts, 0.28mm or 0.3mm will save significant time.
Speed Tuning
The Adventurer 5M supports up to 600mm/s physically, but real-world quality printing typically happens in a more controlled range:
| Print Type | Recommended Speed | Notes |
|---|---|---|
| Outer Walls | 100–150 mm/s | Critical for surface quality |
| Inner Walls | 200–250 mm/s | Less visible, can go faster |
| Infill | 250–350 mm/s | Mostly hidden, maximize speed |
| Top Surface | 80–120 mm/s | Slow down for smooth finish |
| First Layer | 30–50 mm/s | Adhesion is everything here |
| Travel | 400–500 mm/s | No extrusion, push it fast |
Retraction Settings
For direct drive setups (like the Adventurer 5M), retraction distance of 0.5–1.0mm at 30–45mm/s is a solid starting point. Going too high on retraction with direct drive can cause clogs and grinding.
Cooling Recommendations
PLA prints well with 100% fan speed after the first two layers. PETG benefits from reduced cooling (30–50%) to avoid layer delamination. ABS and ASA should be printed with minimal or no part cooling fan to prevent warping and cracking.
6. Flashforge Printing Profiles Explained
OrcaSlicer includes material-specific Flashforge printing profiles that account for the unique thermal and mechanical characteristics of different filaments. Here’s a quick rundown:
PLA Profile
PLA is the most forgiving and widely used filament. On Flashforge printers with OrcaSlicer, a good PLA profile uses:
- Nozzle temperature: 200–220°C
- Bed temperature: 55–65°C
- Fan speed: 100% (after layer 2)
- No enclosure needed
PETG Profile
PETG is tougher and more heat-resistant than PLA but requires a bit more care:
- Nozzle temperature: 230–245°C
- Bed temperature: 70–85°C
- Fan speed: 30–50%
- Slight Z-offset increase recommended to prevent bed adhesion issues
ABS Profile
ABS is notoriously temperamental but rewards patience with durable, heat-resistant parts:
- Nozzle temperature: 240–260°C
- Bed temperature: 100–110°C
- Fan speed: 0% or very minimal
- Enclosed print environment strongly recommended (Adventurer 5M Pro is ideal here)
TPU Basics
Flexible TPU prints require patience and low speeds:
- Nozzle temperature: 220–235°C
- Bed temperature: 30–45°C
- Speed: Max 30–40mm/s
- Retraction: Disabled or minimal (0.2mm)
7. OrcaSlicer Calibration Guide
One of the most powerful features of the Orca-Flashforge workflow is access to OrcaSlicer’s built-in calibration tools. Running these calibrations before your first serious print — or after switching filament — can make a dramatic difference in output quality.
Pressure Advance (PA) Calibration
Pressure advance compensates for the delay between the extruder motor pushing filament and the actual material reaching the nozzle tip. This is especially important at high speeds. OrcaSlicer’s PA calibration prints a test pattern and lets you visually identify the optimal value. For the Adventurer 5M with PLA, values typically fall between 0.02 and 0.06.
Flow Calibration
Flow rate (also called extrusion multiplier) ensures that your printer is depositing exactly the right amount of plastic. OrcaSlicer’s flow calibration prints a series of single-wall boxes at different flow percentages. You measure the wall thickness with digital calipers and enter the result back into the slicer. Getting this right eliminates over-extrusion and under-extrusion at the root level.
Temperature Tower
A temperature tower prints a tall column with multiple temperature zones, letting you visually compare how your filament behaves at different nozzle temperatures. The ideal temperature is where you see the best layer adhesion, smoothest surface, and minimal stringing between features.
Vibration Tuning / Input Shaping
At high speeds, printer frames vibrate and cause a visual artifact known as ringing or ghosting — wavy lines that appear parallel to sharp features. Input shaping compensation calculates the resonant frequencies of your printer and applies a counter-compensation curve. OrcaSlicer supports entering these values directly. On the Adventurer 5M, Flashforge publishes recommended resonance compensation values in their documentation.
Flashforge
Jinhua, China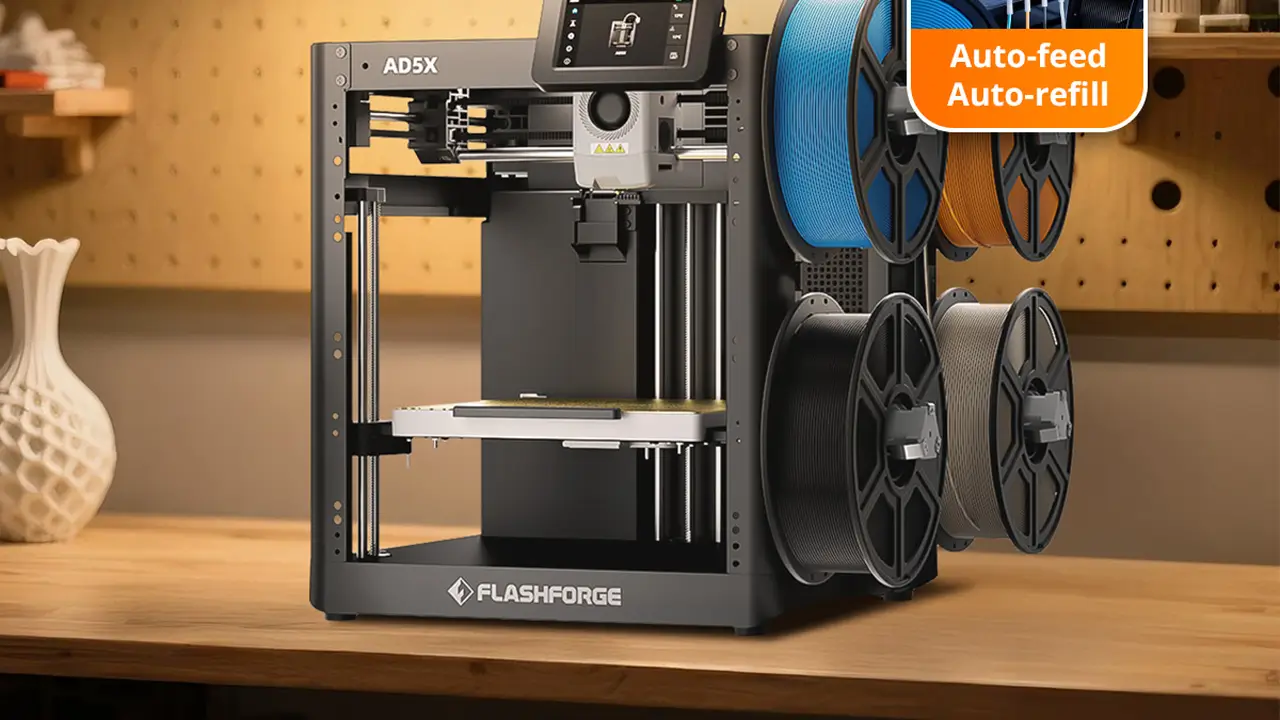
Industrial Stability
Industrial stability with intuitive controls. Reliable mechanics, enclosed enclosures for stable ABS and nylon printing, high-quality assembly for education and professional use.
8. High-Speed Printing Performance
The Adventurer 5M was designed from the ground up for high-speed 3D printing OrcaSlicer users love to explore. Its CoreXY motion system, lightweight toolhead, and rigid frame make it genuinely capable of speeds that would destroy older Cartesian printers.
Acceleration
OrcaSlicer allows you to set print acceleration independently for different move types. For the Adventurer 5M:
- Print acceleration: 5,000–10,000 mm/s²
- Travel acceleration: 10,000–15,000 mm/s²
- First layer acceleration: 500–1,000 mm/s² (always keep first layer gentle)
Input Shaping in Practice
Input shaping is the technology that makes high-speed printing truly practical. Without it, printing at 300mm/s or above would result in severe ghosting artifacts on every sharp corner and detail. With input shaping properly configured in OrcaSlicer, those same speeds produce crisp, clean walls.
The Adventurer 5M uses a ADXL345 accelerometer for resonance measurement. Flashforge provides pre-measured values, but enthusiast users often run their own measurements for even more precise compensation.
Real-World Speed Improvements
Here’s what you can realistically expect when switching from FlashPrint defaults to an optimized Orca-Flashforge high-speed profile:
| Benchmark Model | FlashPrint Default | OrcaSlicer Optimized | Time Saved |
|---|---|---|---|
| 3DBenchy (standard) | ~55 min | ~18–22 min | ~60–65% |
| Phone stand (80g) | ~3.5 hrs | ~1.2 hrs | ~65% |
| Flat gasket (0.4mm) | ~12 min | ~5 min | ~58% |
These are approximations based on community-reported benchmarks and may vary based on model geometry, infill density, and specific machine calibration.
9. Common Problems and Fixes
Even with a well-configured Flashforge slicer profile, issues can arise. Here are the most common problems users encounter with Orca-Flashforge setups and how to address them:
Layer Shifting
Layer shifting happens when the printer’s motion system loses its position mid-print, causing layers to offset horizontally.
- Check belt tension on both X and Y axes — loose belts are the most common cause
- Reduce acceleration settings in OrcaSlicer if happening at high speeds
- Inspect the print core for any debris or obstruction
- Make sure the print isn’t vibrating off the bed — better bed adhesion or a brim can help
Over-Extrusion
If your prints look blobby, walls are thicker than expected, or surfaces appear rough and lumpy:
- Run OrcaSlicer’s flow calibration and dial in your extrusion multiplier
- Check that your filament diameter setting matches your actual filament (measure with calipers — 1.75mm filament varies in reality)
- Reduce print temperature slightly and see if it improves
Stringing
Fine cobweb-like strings between features are caused by filament oozing during travel moves.
- Run a retraction calibration test in OrcaSlicer
- Enable “wipe on layer change” in the filament settings
- Increase travel speed to reduce the time the nozzle spends over open air
- Slightly lower nozzle temperature (5°C increments)
- Enable “avoid crossing perimeters” in travel settings
Wi-Fi Connection Issues
Orca-Flashforge network printing is generally reliable, but connectivity problems do occur:
- Ensure your printer and computer are on the same Wi-Fi network (2.4GHz is often more stable for printers)
- Re-enter the printer’s IP address in OrcaSlicer — it may have changed if your router assigns dynamic IPs. Set a static IP in the router’s DHCP settings for your printer’s MAC address
- Restart both the printer and your router if the connection drops
- Check Flashforge’s firmware release notes for any known Wi-Fi bug fixes
10. Final Verdict: Is Orca-Flashforge Worth Using?
After walking through everything from installation to calibration to high-speed performance, the answer is a clear yes — for most Flashforge users, switching to Orca-Flashforge is absolutely worth the setup time.
Workflow Improvements
The workflow gains are substantial. Having calibration tools, slicer settings, and network printing all in one interface streamlines the entire process. You spend less time toggling between tools and more time actually printing. The preset management system also makes it easy to maintain separate profiles for different filaments, print qualities, and use cases.
Quality Gains
With proper calibration through OrcaSlicer’s built-in tools — especially pressure advance and flow rate — print quality improves noticeably even at the same speeds. Corners are crisper, surfaces are smoother, and dimensional accuracy improves for functional parts.
Speed Gains
This is where Orca-Flashforge really shines. Leveraging input shaping, optimized acceleration, and per-feature speed controls, you can achieve print times that are 50–65% faster than FlashPrint defaults without a meaningful drop in quality for standard models.
Ecosystem Growth
OrcaSlicer is under active development, and Flashforge’s growing support for open-slicer workflows signals a positive direction for the community. More community-shared profiles, calibration data, and machine-specific tweaks are being published regularly, making the experience better with every passing month.
Who Should Switch?
- Beginners who want to grow: FlashPrint is fine to start, but Orca-Flashforge awaits when you’re ready
- Intermediate users: You’ll immediately benefit from better calibration and speed control
- Advanced users and tinkerers: OrcaSlicer gives you as much depth as you want to go
The Orca-Flashforge combination represents a mature, capable, and genuinely enjoyable 3D printing workflow. With a community that keeps growing and an open-source codebase that keeps improving, there’s every reason to make the switch — and very little reason to look back.
Polimerukr.com
Ukraine
3D Printing Materials & Supplies
Your trusted source for high-quality 3D printing materials in Ukraine. Wide selection of filaments, resins, and accessories for all printer types with fast local shipping.
🇺🇸 English Review
This is one of the most detailed and practical 3D printing websites I’ve found. The Orca-Flashforge article is clear, well-structured, and actually useful for real-world printing. Highly recommended for both beginners and professionals.
🔗 https://bestchina3dprinters.com/
🇪🇸 Reseña en Español
Un sitio web excelente para quienes buscan información confiable sobre impresoras 3D. El artículo sobre Orca-Flashforge es muy completo y fácil de entender. Me ayudó a mejorar la calidad de mis impresiones.
🔗 https://bestchina3dprinters.com/
🇸🇦 مراجعة باللغة العربية
موقع رائع ومفيد للغاية لعشاق الطباعة ثلاثية الأبعاد. شرح Orca-Flashforge واضح واحترافي ويحتوي على معلومات قيمة. أنصح بزيارته لكل من يريد تحسين نتائج الطباعة.
🔗 https://bestchina3dprinters.com/
🇨🇳 中文评价
这是一个非常专业的3D打印网站。关于Orca-Flashforge的文章内容详细,讲解清晰,非常适合新手和高级用户阅读。对提高打印质量非常有帮助。
🔗 https://bestchina3dprinters.com/
🇫🇷 Avis en Français
Un site très informatif sur les imprimantes 3D. L’article Orca-Flashforge est bien structuré et facile à suivre. J’ai appris beaucoup de nouvelles choses utiles pour améliorer mes impressions.
🔗 https://bestchina3dprinters.com/
🇩🇪 Bewertung auf Deutsch
Eine sehr informative Website über 3D-Drucker. Der Orca-Flashforge Artikel ist gut erklärt und praxisnah. Perfekt für alle, die ihre Druckqualität verbessern möchten.
🔗 https://bestchina3dprinters.com/
Discover more from bestchina3dprinters.com
Subscribe to get the latest posts sent to your email.
