 Skip to content
 A Beginner-Friendly Enclosed 3D Printer Worth Your Attention


Introduction to Flashforge Adventurer 3
If you’ve been searching for a reliable, easy-to-use 3D printer that doesn’t require hours of tinkering before your first successful print, the Flashforge Adventurer 3 review community has consistently pointed to this compact machine as one of the standout choices for newcomers. This Flashforge 3D printer review aims to give you a thorough, honest look at what the Adventurer 3 actually delivers in real-world conditions — from unboxing to finished prints sitting on your desk.
The Flashforge Adventurer 3 launched as a direct answer to a simple question: can a 3D printer be genuinely plug-and-play? For years, desktop FDM printing meant wrestling with bed leveling, manual calibration, and a steep learning curve that turned away many potential enthusiasts. Flashforge looked at that problem and built a machine around solving it.
What you get with the Adventurer 3 is a fully enclosed printer with a detachable nozzle system, auto-filament loading, a color touchscreen, built-in camera, and WiFi connectivity — all wrapped in a clean, compact chassis that sits comfortably on a desk or shelf. It’s a machine designed for students, home users, educators, and anyone stepping into 3D printing without a technical background.
Throughout this review, we’ll walk through every aspect of the printer — comparing it to its sibling the Flashforge Finder, examining print quality, breaking down the specs, and giving you a clear picture of who this printer is truly built for.
Flashforge Finder vs Adventurer 3
One of the most common questions in the community is: Flashforge Finder review vs Adventurer 3 — which one should you actually buy? These two printers share Flashforge’s commitment to beginner accessibility, but they serve slightly different needs.
The Flashforge Finder was the company’s earlier take on beginner-friendly printing. It features a similar enclosed design, a color touchscreen, and WiFi connectivity. It’s quieter than many of its competitors, uses a slide-in build plate, and focuses almost exclusively on PLA printing. For classrooms and children, the Finder was a safe, low-fuss option that still holds up reasonably well.
The Flashforge Adventurer 3 vs Finder comparison quickly reveals where the newer model moves the goalposts:
| Feature | Flashforge Finder | Flashforge Adventurer 3 |
|---|---|---|
| Build Volume | 140 × 140 × 140 mm | 150 × 150 × 150 mm |
| Heated Bed | No | Yes (up to 100°C) |
| Nozzle System | Fixed | Detachable / Quick-swap |
| Built-in Camera | No | Yes |
| Filament Compatibility | PLA only | PLA, ABS, PETG |
| Auto Filament Loading | Yes | Yes |
| WiFi Connectivity | Yes | Yes |
| Max Nozzle Temp | 200°C | 240°C |
| Noise Level | ~45 dB | ~45 dB |
The addition of a heated bed alone is a significant upgrade. It opens the door to printing with materials beyond PLA and dramatically improves first-layer adhesion, reducing print failures on the very thing beginners struggle with most. The quick-swap nozzle is another practical win — instead of waiting for things to cool and using tools to swap a nozzle, you pop one off and click a new one in within seconds.
The Finder still makes sense in environments where simplicity is paramount — primary school classrooms, for instance, where PLA-only printing is perfectly fine. But for anyone who wants a little more versatility and the ability to grow into more materials, the Adventurer 3 is the clear step up.
Flashforge
Jinhua, China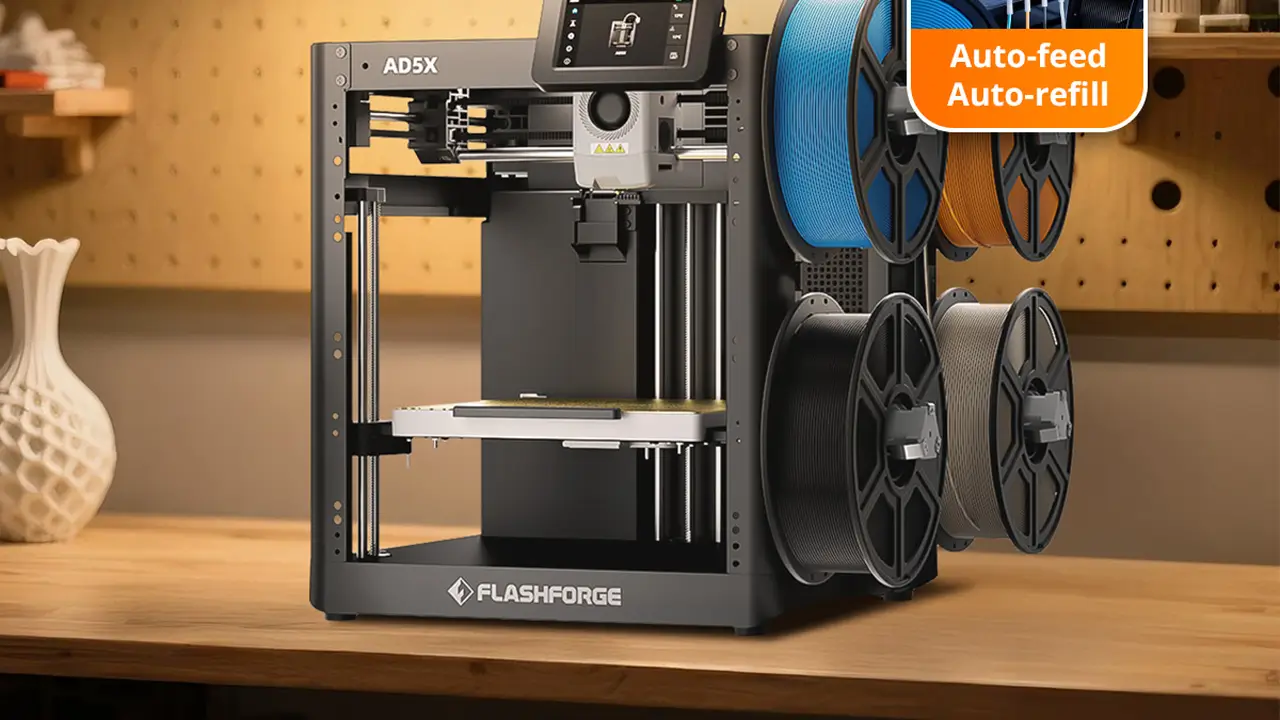
Industrial Stability
Industrial stability with intuitive controls. Reliable mechanics, enclosed enclosures for stable ABS and nylon printing, high-quality assembly for education and professional use.
Design and Build Quality
When you first set eyes on the Adventurer 3, it’s immediately clear this is not a hobbyist kit machine. The enclosed beginner 3D printer aesthetic is clean, compact, and professional — something you wouldn’t feel embarrassed placing in a home office or school library.
The enclosure itself is built from solid plastic panels with a transparent front door and top panel, letting you watch prints without opening the machine. This is more than just aesthetically pleasing — the enclosed design actively traps heat, which helps with print consistency and reduces warping, especially on larger flat prints.
The Flashforge Finder 3D printer design lineage is clearly visible in the Adventurer 3’s layout — the same friendly rounded corners, the touchscreen positioned on the front face, and the filament holder mounted externally on top. It’s a design language that communicates approachability, not intimidation.
Build quality feels solid throughout. The print bed is made of a removable, slightly flexible build plate that makes part removal genuinely easy — flex the plate slightly and prints pop off without the usual prying and scraping. This is a detail that experienced printer users genuinely appreciate, because damaged prints and frustrated fingers are common side effects of rigid glass beds.
The overall footprint is compact at 388 × 340 × 405 mm, and the weight sits at around 4.9 kg — light enough to be moved around easily but substantial enough to feel like a quality piece of equipment.
Ventilation is handled through an integrated HEPA-style filter at the rear, which helps reduce particulates and fumes during printing — an important feature in enclosed spaces like classrooms or home offices with limited ventilation.
Flashforge Adventurer 3 Specs Overview
Let’s get into the numbers. Here’s a full breakdown of the Flashforge Adventurer 3 specs pulled from official Flashforge documentation:
| Specification | Detail |
|---|---|
| Build Volume | 150 × 150 × 150 mm |
| Layer Resolution | 0.1 – 0.4 mm |
| Print Speed | 10 – 100 mm/s |
| Nozzle Diameter | 0.4 mm (detachable, quick-swap) |
| Max Nozzle Temperature | 240°C |
| Heated Bed | Yes, up to 100°C |
| Bed Leveling | Automatic |
| Supported Filament Diameter | 1.75 mm |
| Connectivity | WiFi, USB |
| Display | 3.5-inch color touchscreen |
| Built-in Camera | Yes |
| Noise Level | ≤ 45 dB |
| Machine Dimensions | 388 × 340 × 405 mm |
| Machine Weight | 4.9 kg |
| Compatible Slicing Software | FlashPrint |
| Supported File Formats | .STL, .OBJ, .FPP, .G |
| Air Filter | HEPA filter included |
| Power Input | 100–240V, 50/60Hz |
The 150 × 150 × 150 mm build volume is modest but entirely practical for most beginner and intermediate use cases — phone stands, keychains, small figurines, educational models, replacement parts. The 240°C maximum nozzle temperature is the number that unlocks material versatility beyond PLA. The integrated camera is a genuinely useful bonus that lets you monitor prints remotely.
Initial Setup and Calibration
This is where the Adventurer 3 truly earns its reputation. The Flashforge Adventurer 3 setup experience is about as smooth as consumer 3D printing gets right now.
Unboxing is refreshingly straightforward. The printer comes well-packaged with minimal assembly required. You remove the foam inserts, attach the filament spool holder to the top, and plug it in. There are no loose gantry parts to bolt together, no rails to square up, no belts to tension. The machine arrives essentially ready to print.
Auto-loading filament is one of those features you don’t fully appreciate until you’ve fought with a stubborn Bowden tube feed on a budget open-frame printer. On the Adventurer 3, you insert the filament into the inlet, tap “Load” on the touchscreen, and the extruder motor automatically grips and feeds the filament through to the nozzle. Within a couple of minutes, you see filament extruding — the signal that you’re ready to print.
The touchscreen UI is clean and responsive. The 3.5-inch color display gives you access to all key functions: start prints from USB or WiFi, control temperatures, move axes, check camera feed, and manage settings. The menu layout is logical and doesn’t require any prior 3D printing knowledge to navigate — which is exactly the point.
Automatic bed leveling handles what is arguably the most frustrating part of 3D printing for beginners. The Adventurer 3 measures the bed plane automatically and compensates in software, so you’re not manually turning corner screws and running test prints over and over to get a level surface. This alone saves new users hours of confusion and failed first layers.
The overall beginner experience from box to first print can genuinely be achieved in under 30 minutes, which puts the Adventurer 3 in a very small category of printers that truly deliver on the “plug-and-play” promise.
Print Quality Test Results
Here’s where things get interesting. Flashforge Adventurer 3 print quality is genuinely competitive within its class, though it’s important to set accurate expectations.
PLA prints are the machine’s strongest suit. Standard PLA at 0.2 mm layer height produces clean, consistent results with smooth surfaces and good detail on features down to around 1 mm. Overhangs up to approximately 45–50 degrees print without significant sagging or support issues. Bridges across gaps of 50–60 mm come out acceptably clean without drooping.
Layer consistency is one of the Adventurer 3’s quiet strengths. Because the machine uses a direct-drive style extruder and the enclosed environment maintains relatively stable temperatures, you tend to get predictable, repeatable layer lines without the random under-extrusion or over-extrusion spikes that plague cheaper open-frame machines with long Bowden tubes.
Noise levels are kept to a commendably low ≤ 45 dB during operation. In practical terms, this means the printer running in the same room as a conversation or a video call is not disruptive. It’s noticeably quieter than most open-frame FDM printers, which is a direct benefit of the enclosed chassis dampening motor and fan noise. This is particularly valuable in shared spaces — an office, a classroom, or a living room.
Print speed operates at a practical range of 10–100 mm/s. In real-world use, the sweet spot for quality PLA printing tends to sit around 40–60 mm/s. Pushing the machine toward 100 mm/s is possible but results in slightly reduced surface quality and more visible layer lines. For a beginner printer, the default speed profiles in FlashPrint are well-tuned and represent a sensible balance between time and quality.
One area worth being realistic about: the Adventurer 3 is not a high-speed printer by 2024–2025 standards. Machines with CoreXY motion systems and input shaping have raised the bar significantly on raw speed. But speed isn’t the Adventurer 3’s value proposition — reliable, fuss-free print quality for users who prioritize simplicity over performance is.
Supported Materials and Filaments
Flashforge Adventurer 3 filament compatibility covers the most commonly used desktop printing materials, though with some nuance.
PLA is the primary material this machine is optimized for, and it handles it exceptionally well. PLA prints reliably at nozzle temperatures between 190–220°C on the Adventurer 3, and the heated bed ensures good adhesion even for prints with larger base footprints.
ABS is officially supported and is where the enclosed chamber design pays real dividends. ABS requires stable ambient temperatures to prevent warping and layer delamination — the enclosed build environment of the Adventurer 3 helps maintain that thermal consistency significantly better than open-frame alternatives. That said, ABS printing still produces fumes, so ensuring the HEPA filter is in good condition and the room has some ventilation is advisable.
PETG works well on the Adventurer 3 given its 240°C maximum nozzle temperature. PETG typically prints at 230–240°C, so the machine operates right at its thermal ceiling for this material. Results are generally good with properly tuned settings.
Flexible filaments such as TPU represent a limitation of the Adventurer 3. The machine uses a Bowden-style extruder configuration, which creates a gap between the drive gear and the nozzle. Flexible filaments have a tendency to buckle and tangle in this gap rather than feed consistently. While some users have had success with stiffer flexible materials (Shore hardness 95A+), softer TPU is not reliably supported and Flashforge does not officially list it as a compatible material.
| Material | Supported | Nozzle Temp | Notes |
|---|---|---|---|
| PLA | Yes | 190–220°C | Excellent results, primary material |
| ABS | Yes | 220–240°C | Enclosure helps reduce warping |
| PETG | Yes | 230–240°C | At nozzle temp ceiling, tune carefully |
| TPU / Flex | Limited | 220–230°C | Bowden extruder limits reliability |
| PVA / Support | No | — | Single extruder only |
| Carbon Fiber / Abrasive | No | — | Standard brass nozzle not suitable |
For the target audience of this machine — beginners, students, and home users — PLA and PETG cover the vast majority of real-world printing needs. The material limitations only become a concern if you’re planning to expand into engineering-grade or specialty filaments.
Software and Connectivity Features
The software side of this Flashforge 3D printer review is another area where the company has invested meaningfully in beginner accessibility.
FlashPrint slicer is Flashforge’s proprietary slicing software, available free for Windows, macOS, and Linux. The interface is more guided and less intimidating than open-source options like PrusaSlicer or Cura. Default print profiles for Flashforge printers are pre-loaded and well-optimized, meaning a beginner can import an STL file, click “Start Slicing,” and get a usable result without touching any advanced settings.
For users who want more control, FlashPrint does expose layer height, print speed, support structures, infill patterns, and temperature settings. It’s not as feature-rich as Cura’s expert mode, but for the beginner-to-intermediate range, it covers everything you’re likely to need.
WiFi printing works through direct connection to your local network, configured through the touchscreen during initial setup. Once connected, FlashPrint can detect the printer on the network and send files wirelessly — no USB drive required. This is a small but meaningful quality-of-life feature that reduces friction in everyday use.
Cloud printing via the Flashforge cloud platform is available, allowing you to send print jobs remotely from outside your home network. This requires a Flashforge account and app installation, but once configured, it works reliably for initiating and monitoring prints from anywhere.
Webcam monitoring through the built-in camera integrates with both the FlashPrint desktop software and the mobile app. You can check in on a running print from your phone, pause or cancel remotely if something goes wrong, and even capture timelapses. For long prints that run overnight, this monitoring capability provides genuine peace of mind and the ability to catch failures early rather than waking up to a spaghetti mess on the bed.

AndreevWebStudio.com
Professional web development and design services. Custom WordPress sites, landing pages, e-commerce solutions, and 3D printing content creation for businesses and creators.
- • WordPress Development
- • Custom Web Design
- • E-Commerce Solutions
- • 3D Printing Content
Pros and Cons
After a thorough look at everything the Flashforge Adventurer 3 beginner printer offers, here’s an honest summary of where it wins and where it falls short — including some perspective against the current landscape of budget and mid-range 3D printers.
| Pros | Cons |
|---|---|
| Genuinely easy setup — under 30 minutes to first print | Small 150 × 150 × 150 mm build volume |
| Automatic bed leveling removes a major beginner frustration | Slower print speeds compared to modern CoreXY printers |
| Enclosed design improves print consistency and reduces noise | Flexible filament (soft TPU) not reliably supported |
| Quick-swap nozzle system is practical and tool-free | FlashPrint less capable than Cura for advanced users |
| Built-in camera for remote monitoring | Single extruder — no dual-material or soluble support |
| WiFi and cloud printing for wireless convenience | Price point higher than some open-frame competitors |
| Quiet operation suitable for shared spaces | HEPA filter requires periodic replacement |
| Heated bed enables PLA, ABS, and PETG printing | 240°C nozzle ceiling limits exotic material options |
| Compact footprint fits in office, classroom, or home | No direct competitor to modern budget speed champions |
Compared to modern budget printers like the Bambu Lab A1 Mini or Creality Ender-3 V3 SE, the Adventurer 3 gives up ground on raw print speed and, in some cases, build volume. However, those alternatives often come with a steeper setup learning curve or less refined beginner experience. The Adventurer 3’s value lies in its completeness and polish as a ready-to-run system rather than in matching spec-sheet numbers against machines designed for different priorities.
Final Verdict
After spending quality time with the Flashforge Adventurer 3 review, one thing stands out above everything else: this printer keeps its promises. It says it’s beginner-friendly, and it genuinely is. It says setup is simple, and it genuinely is. It says print quality is reliable, and for PLA and PETG, it consistently delivers.
For beginners stepping into 3D printing for the first time, the Adventurer 3 removes nearly every obstacle that typically causes new users to give up in frustration. Auto-leveling, auto-filament loading, a guided touchscreen, WiFi printing, and a camera that lets you monitor from your phone — these features, bundled in a quiet, compact enclosed machine — create an experience that feels designed with care for real people.
For schools and educational environments, the Adventurer 3 is a strong recommendation. The enclosed design means curious hands can’t accidentally contact hot moving parts during operation. The quiet operation doesn’t disrupt a classroom. The simple touchscreen UI means students can learn the process without needing an IT specialist to manage the printer. The HEPA filter addresses indoor air quality concerns that responsible educators rightly prioritize.
For home makers and hobbyists working in apartments, shared living spaces, or home offices, the compact footprint and low noise level are practical advantages that genuinely affect daily use. Being able to run a print while working from the same room, without constant fan whirr and motor noise, is a real quality-of-life benefit.
For compact workspace users who don’t have the luxury of a dedicated workshop or maker space, the Adventurer 3 fits on a standard desk alongside a computer without dominating the room, while still delivering genuine 3D printing capability.
Where the Adventurer 3 is not the right answer is when you need a large build volume, maximum print speed, or the ability to work with advanced engineering filaments. For those needs, you’ll want to look at machines built around different priorities.
But for what this printer sets out to do — make 3D printing genuinely accessible, reliable, and pleasant for people who are new to the hobby or need a fuss-free machine in a shared environment — the Flashforge Adventurer 3 remains one of the most thoughtfully designed enclosed beginner 3D printers available. It’s not trying to be the fastest or the most feature-packed. It’s trying to be the most approachable. And it succeeds.
Polimerukr.com
Ukraine
3D Printing Materials & Supplies
Your trusted source for high-quality 3D printing materials in Ukraine. Wide selection of filaments, resins, and accessories for all printer types with fast local shipping.
🇬🇧
Excellent review of the Flashforge Adventurer 3. The article explains the setup, print quality, and beginner features very clearly. One of the best 3D printer review websites I’ve found recently.
https://bestchina3dprinters.com/
🇪🇸
Muy buena reseña de la Flashforge Adventurer 3. El sitio explica perfectamente la calidad de impresión, la configuración y las funciones para principiantes. Excelente página para descubrir nuevas impresoras 3D.
https://bestchina3dprinters.com/
🇸🇦
مراجعة ممتازة لطابعة Flashforge Adventurer 3. الشرح واضح وسهل الفهم، خاصة للمبتدئين في الطباعة ثلاثية الأبعاد. الموقع يحتوي على معلومات مفيدة ومراجعات احترافية للغاية.
https://bestchina3dprinters.com/
🇨🇳
非常专业的 Flashforge Adventurer 3 评测。文章详细介绍了打印质量、安装过程以及适合初学者的功能。我很喜欢这个网站上的 3D 打印机内容。
https://bestchina3dprinters.com/
🇫🇷
Très bon article sur la Flashforge Adventurer 3. Les explications sont claires et détaillées, surtout pour les débutants en impression 3D. Le site propose des tests modernes et très utiles.
https://bestchina3dprinters.com/
🇩🇪
Sehr guter Testbericht über den Flashforge Adventurer 3. Die Druckqualität, Einrichtung und Funktionen werden verständlich erklärt. Eine großartige Webseite für aktuelle 3D-Drucker Reviews.
https://bestchina3dprinters.com/
Discover more from bestchina3dprinters.com
Subscribe to get the latest posts sent to your email.
